Guide - Modding your Dreamcast VGA Box for 15/31KHz output

There are not a lot of reasons to do this since most games look much better in 31KHz and almost every game can be forced to output at this frequency, but there are a couple of reasons. In my case, I have two arcade monitors and only one of them is capable of 31KHz. If I want to play Dreamcast games on the low-res monitor, the best option is to have a VGA box that also outputs at 15KHz. Note: Noami games at 15KHz will be at 480i (yuck), but Bangai-O runs in 240p and I believe SFIII Third Strike can be forced in 240p as well.
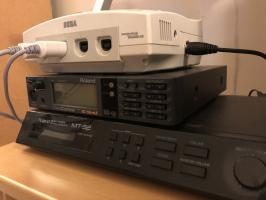
The VGA box I used for this is one of the easiest to get your hands on.
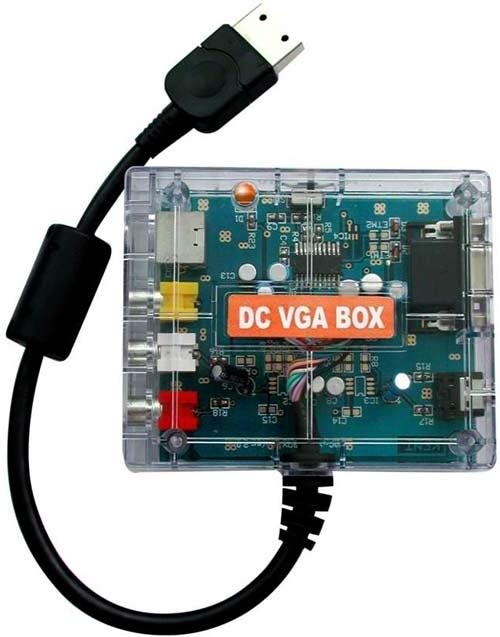
It can be purchased at Racketboy or can be had for a few bucks cheaper on eBay.
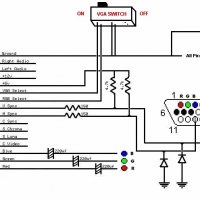
I used this guide to help me figure out what exactly I needed to do, but it's really very straight-forward: if pin 6 and 7 are both grounded you will get 31KHz, if only pin 7 is grounded, you will get 15KHz.
Dreamcast A/V pinout here. Since pins 6 and 7 only serve this purpose, to prevent 6 from being grounded, you can simply cut it. since we want to switch between 15 and 31KHz, we are going to add an on/off switch to complete or break the pin 6 connection.
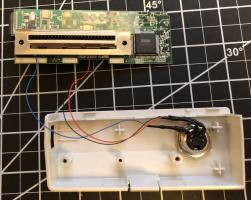
If you're using the same VGA box I used, this is nice and easy. Pin 6 should be the dark blue wire. Pull the hot glue off of the PCB where the wires meet the board being careful not to damage anything. Use your desolder braid and soldering iron on the back of the board to remove the solder from the dark blue wire's connection and pull it out of the hole. Now you need to use a multimeter to verify that this is pin 6. Use an alligator clip to connect one end to the dark blue wire, and use the other end to touch pin 6 on the part of the cable that makes contact with the Dreamcast's A/V out (remember that because this mirrors the A/V pinout, you're counting up from RIGHT to LEFT). If it turns out that your wire coloring is different, you might have to solder this back in and try a different one. You can do your best to deduce which one might be pin 6, but because pin 6 is grounded as long as it is soldered into the board, you won't know for sure until you desolder and remove the wire.
Once you have identified the correct wire as pin 6 and removed it from the board, connect it to one of the connections on your on/off switch. Now you'll need another stranded wire, ideally smaller than 22 gauge, but this is what I used by clipping a few of strands off so that it would fit into the hole on the PCB which we removed the pin 6 wire from. You need to solder one end of this wire into the pin 6 hole and the other end onto the other connection of on/off switch.
You should now have something that looks as below:
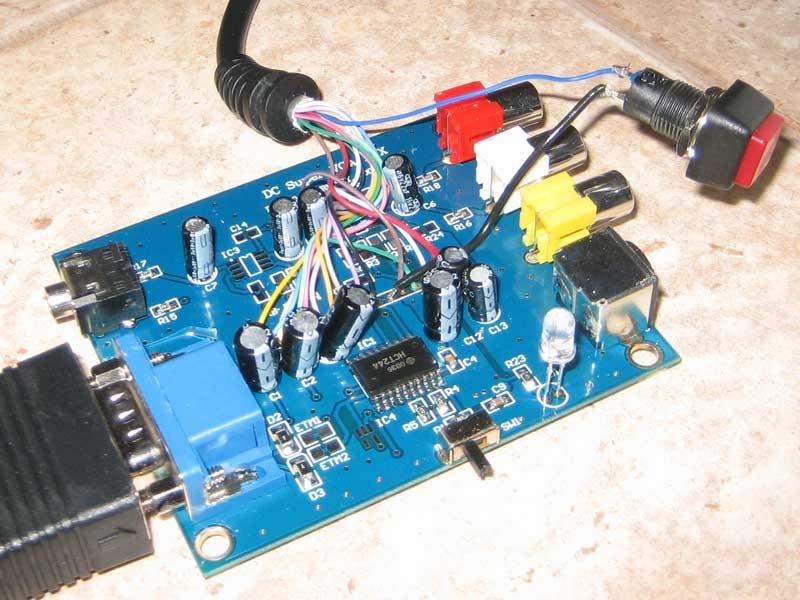
When the button is on, pin 6 is grounded and you'll have a 31KHz signal, and when the button is off, pin 6 is not grounded and you will get a 15KHz signal. To test this out, set it to 15KHz and see if you can boot up Bangai-O. Bangai-O will not be able to boot in 31KHz, so if it it does successfully boot, your 15KHz setting is working. Now boot a Naomi game in 31KHz and make sure you have a beautiful, crisp 480p image to ensure your 31KHz setting is working.
Assuming there are no problems, you can drill a hole in the plastic enclosure. There is plenty of room right next to the TV/PC switch on the VGA box, and the blue wire should be able to just reach this far. Hold the two parts of the enclosure together without the PCB inside and drill a hole just to the left of the switch. The hole should be about half on the bottom side of the enclosure, and half on the top. Now simply reassemble the VGA box with the on/off switch fitting snugly in the hole you just made.
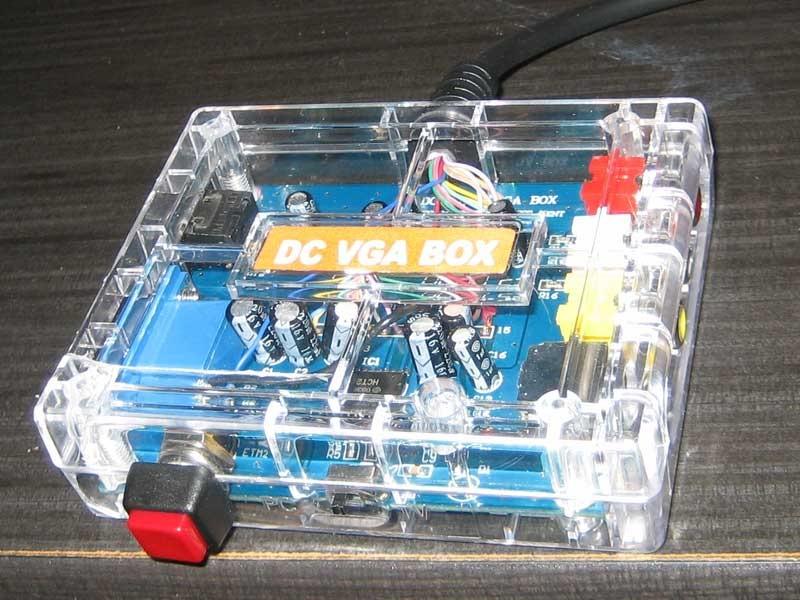
If you have a different VGA box you're trying to do this too, things can get more complicated. I originally had a different VGA box that I accidentally destroyed while trying to mod. It turned out that pin 6 was connected to pin 7 way up near the pin header, so there was no pin 6 wire in the VGA box to cut. So other VGA boxes might not be so simple to work with, but the general idea is the same: install an on/off switch that completes/breaks the connection between pin 6 and the ground (or any grounded wire, including pin 7).
Enjoy Bangai-O in 240p!
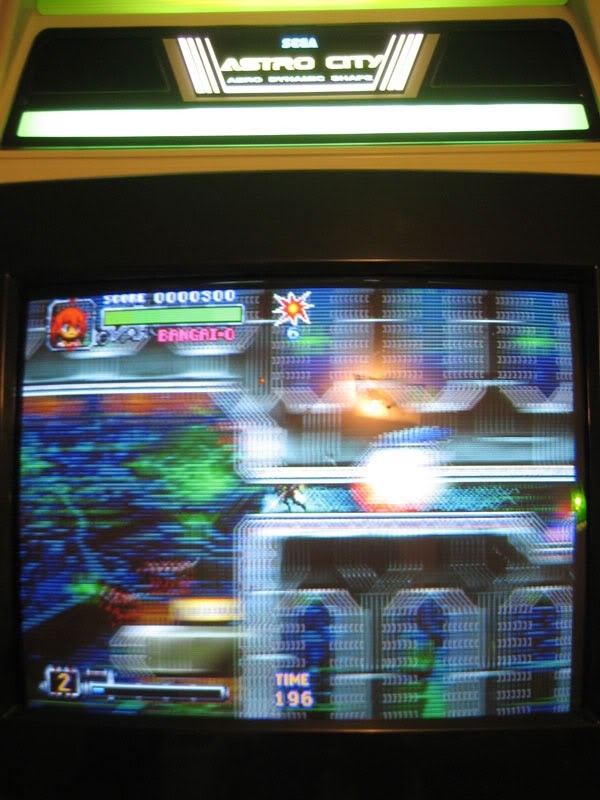
Edit: To get this signal to display on most low-res monitors, you're going to have to toy with the sync signals to get a negative composite sync. I'm currently working on that now and will update this post with the details once I've got it working.
Important Note:
If you're doing this mod, there's a good chance you're looking to play SFIII Third Strike in 240p, but the American and Japanese versions have some sort of video protection that won't allow the game to run in RGB mode on a PAL console. You will simply boot into a black screen without applying this patch to the disc image:
1) look for
09 00 09 00 09 00 09 00 09 00 30 88 07 89 06 A0 09 replace it with
07 89 32 88 07 89 33 88 07 89 30 88 07 89 06 A0 09
2) look for
00 E0 00 E0 04 7F 26 4F 0B 00 replace it with
02 E0 00 E0 04 7F 26 4F 0B 00
3) look for
30 E0 02 2E 00 E0 26 4F 0B 00 F6 6E replace it with
4C 84 02 2E 00 E0 26 4F 0B 00 F6 6E
4) look for
07 D3 31 60 19 40 03 C9 02 88 00 8B 03 E0 0B 00 09 00 replace it with
22 4F 06 B0 09 00 26 4F 03 E4 19 40 09 24 0B 00 43 60 





Comments