Altered Destiny (Walkthrough)

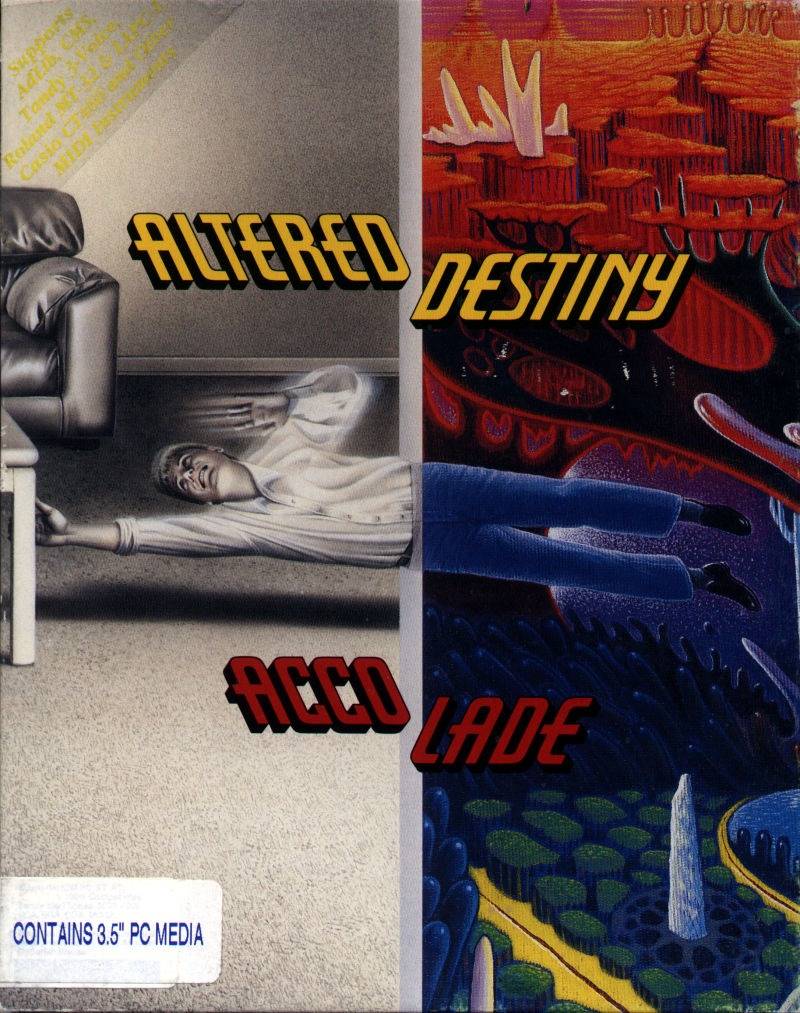
ALTERED DESTINY
1 Plot, Getting Equipped
2 Frags, Floaters, Crossroads
3 Indella, Divination, Cliff
4 Crystals, Towhee, Dreams
5 Luella, Fear, Defoil Herb
6 Weird Woods, Hoppa, aRRaRRa
7 Floating Floor, Howler Lake, Kleeg, Helmar, Endgame
ALTERED DESTINY: Part 1
Hello, P. J. Barrett. As a middle manager in a large corporation, you lead a pretty cushy life. Tonight you've got a stay-at-home date with your beautiful girlfriend, Trudy, to watch a film festival on television; the only fly in the ointment is that your television is in the shop. On the way to pick it up, you see a Conanesque barbarian (complete with sword) coming out of the repair shop with a TV that looks a lot like yours. In fact, it _is_ yours. Embarrassed by the mix-up, the repairman gives you the barbarian's futuristic television as a loaner. All seems to be well, until Trudy arrives at your apartment, slips away to put on something more comfortable, and a mysterious force sucks you into the TV!
The television turns out to be a gateway to another universe. In that other universe, you meet Jonquah, who had intended to summon a mighty warrior through the gateway between worlds. Alas, he got you instead, but you'll have to do. Jonquah wants you to save the universe from his twin brother, Helmar, who has been corrupted by the stolen Jewel of Light. The Jewel has created an instability in the universe; you must destroy the Jewel before it destroys everything else. Not the sort of work that a middle manager is usually called on to do.
As the introductory sequence ends and the game begins, you find yourself on the planet Daltere, in a small clearing on an island suspended high atop a massive growth of vines. LOOK around to get a description of where you are. (It's always a good idea to LOOK as soon as you enter a new scene, but this is the only time you'll hear it from me.) Watch out for the edges of the island and that hole behind you -- there are a lot of cliffs to fall off in this game. Go one screen to the right and you'll find yourself between a strange factory and a small hut.
Enter the hut and you'll be face to face with Alnar, an artisan who forges objects out of metal. In fact, he already has a few such objects handy. GET THE SWORD, GET THE AXE, and ask Alnar for a personal favor: ALNAR, MAKE A CAGE. It'll come in handy later.
While you wait for Alnar to finish the cage, ASK ALNAR ABOUT THE SWORD and THE AXE. (That's two commands, not one.) Then, when the cage appears on the counter, GET THE CAGE, and EXIT. Once outside, go left one screen, back to the clearing.
See that rocky arch in the middle of the screen? Go through it. When you reach the other side, work your way around to the far side of the large hole. (You should SAVE the game before you do this, because there's a good chance you'll fall in the hole the first time you try to go around it. In fact, it's a good idea to SAVE this game whenever possible, because even this walkthru won't prevent you from falling off cliffs, stumbling during fights, or dying in any of a hundred other ways because your reactions are just a little off.) You should now be standing next to a flight of stairs descending into the depths of the island. Walk down the stairs and into a small dwelling.
Unfortunately, the owner of the dwelling isn't home, but he left a sign behind in case he had visitors. EXAMINE THE SIGN to find out where he is, then EXIT. Go one screen to the right to the other side of the strange factory. Go down the stairs to the main floor of the factory, and step through the green pillars at the bottom.
ALTERED DESTINY: Part 2
You're in Tentro's shop. Tentro uses colored pigments (which conveniently fall from the sky) to make frags, colorful objects that carry information. ASK TENTRO ABOUT FRAGS and anything else that might come to mind. See those spherical objects on one of Tentro's assembly lines? Walk over to them and GET A SPHERE, then EXAMINE THE SPHERE. It has a story to tell. DROP THE SPHERE, walk to the far left end of the workshop, and GET THE TUBE. When you EXAMINE THE TUBE, you'll see that it's used for holding frags. There are several frags on the assembly line next to you. You can't GET THE FRAGS without the tube's help, so POINT TUBE AT THE FRAGS, and it will suck up the frags for you. EXAMINE the frags in this order: PYRAMID, SMALLISH FRAG, CYLINDER, and CUBE. They, too, have a story to tell. GET THE BOTTLE OF PIGMENT (from the shelf next to the frags), and leave the workshop.
Go back up the stairs and walk one screen to the right to Land's End. See that flat rock on the eastern end of the island? Stand in the middle of it (but be careful not to walk over the edge) and a transporter will float over to the rock. It can't hold too much weight, so DROP THE AXE before you step onto the transporter.
The transporter takes you to the smaller of the two suspended islands, Runes Island, doubtlessly named after the two columns in the middle of the island covered with incomprehensible runes. In the small shelter at the other end of the island you see Vindah, whose dwelling you entered back on the large island. Enter the shelter and TALK TO VINDAH. ASK VINDAH ABOUT JONQUAH, HELMAR, and anything else you'd like to know about. Notice how he keeps mentioning divinations? ASK VINDAH ABOUT DIVINATIONS and he'll tell you that to do a proper divination, he needs an Indella bird. ASK VINDAH ABOUT INDELLA BIRD and you'll learn that they are attracted by pretty colors, and live somewhere in the woods. He'll also warn you about the "natural springs" that you may encounter in the woods.
When you've finished talking to Vindah, EXIT the shelter, walk back to the transporter, and it will carry you back to the large island. After you step off the transporter and back onto the flat rock, remember to GET THE AXE.
Now you need to find a floater. These are the green, balloon-like plants (or are they animals?) that float up to the island from somewhere below. Floaters are the elevators of Daltere: Small floaters take you down; large floaters carry you up. Look for a small floater and GRAB SMALL FLOATER. It will lift you a short distance, then carry you down to the surface of Daltere.
The floater drops you off at the Crossroads. You'll visit here often before the game is over. Roads branch off to the northeast, northwest, southeast, and southwest. Take the one to the southeast to the Edge of the Forest. Of which forest is this the edge? Why, the Forest of Dreams, of course.
Starting from the Edge of the Forest screen, go left one screen, down one screen, and right one screen. Pause for a moment to watch the fluboxes taking a nap. See that hammock strung between two trees? We'll be back later to take advantage of it. For now, go one more screen to the right, down one screen, and left one screen to the Bottom of the Hill. You have now had the grand tour of the Forest of Dreams.
No doubt you've noticed the bright yellow leaf lying on the ground at the Bottom of the Hill, so GET THE LEAF. You've probably also noticed the narrow path leading southward. You're not ready to take this path yet, but if you're curious to see what's at the other end, SAVE the game, and head up the path. You'll end up at Howler Lake, where the "plaintive cries" of the Howlers draw you inexorably into the waters. Bye-bye, P. J.!
ALTERED DESTINY: Part 3
RESTORE the game and don't take the path this time. Instead, retrace your steps back to the Edge of the Forest. (Go right, up, left, left, up, and right.) There are two paths leaving the forest. Take the one on the right to return to the Crossroads.
This time, take the northwest path, which leads to A Wooded Area -- the beginning of the Weird Woods. While you're in the Woods, keep your eye out for the Hoppa, a living spring that bounces along through the tree tops looking for victims it can pollinate and turn into plants. Could the Hoppas be the "natural springs" that Vindah warned you about? Maybe so, but don't worry about the Hoppas for now. They won't hurt you...yet.
Go up one screen. See that glow in the distance? We'll be back to check that out in more detail later. For now, go one screen to the right. Blocking the rear of this screen is a lattice-like web climbing up into unseen heights. Wade through the pools of water between you and the web, and CLIMB THE WEB.
At the top of the web, you'll find yourself on a broad terrace dotted with pools of water. Watch out for the pools with tiny whirlpools in them. Step in one and you'll be sucked downward to your death. Go down one screen and you'll see the Indella bird nesting in the webwork. DROP THE CAGE, SET THE TRAP, and BAIT THE CAGE WITH PIGMENT. (Indella birds are attracted to brightly colored things, remember?) If the Indella bird vanishes while you're setting the trap, exit this screen and reenter it; it will return while you're gone.
Now, sit back while the Indella bird takes the bait. Once he's in the cage, GET THE CAGE, and go one screen to the right. There's a large seed shell sitting on the ground. GET THE SHELL, walk into the pool of water at the bottom of the screen (the one without the whirlpool), and FILL THE SHELL WITH WATER. You'll need the water later. Go one screen up (watch out for the waterfall at the top of the second pool) and one screen right, and you'll find yourself back where you started. CLIMB THE WEB back down to ground level and go back to A Wooded Area (one screen left and one screen down). Exit at the bottom of the screen and you'll return to the Crossroads.
You've got the Indella bird, so maybe Vindah will be willing to give you a divination. Wait for one of the tube plants to disgorge a large floater and GRAB LARGE FLOATER. You'll return to the large island. Go through the rocky arch, around the hole, and right two screens. Step on the flat rock, DROP THE AXE, and step onto the transporter. Once on Runes Island, go to Vindah's shelter, and GIVE CAGE TO VINDAH. He will remove the Indella bird and the jar of pigment from the cage, and the bird will start strutting about on the floor. ASK VINDAH ABOUT DIVINATION. Vindah indicates in turn that he needs something for the bird to leave markings on. How about the leaf you found in the Forest of Dreams? GIVE LEAF TO VINDAH. The bird paces around the leaf, squats in the pigment, and finally leaves markings on the leaf. What do the markings mean? "You are a dreamer," Vindah tells you, "though some accomplish more in their dreams than others do in a lifetime." Clear as mud.
EXIT Vindah's shelter, walk to the transporter, and let it return you to the large island where you can GET THE AXE. Then, GRAB A SMALL FLOATER to take you back to the Crossroads. Head southwest from the Crossroads this time, and you'll end up By a Cliff. Recessed into the ground (near the bottom of the screen) is a diamond-shaped plate. EXAMINE THE PLATE and you'll see that it has some oddly shaped holes in it. Where have you seen those shapes before? That's right: the frags. POINT THE TUBE AT THE PLATE and the frags will be neatly expelled into the holes.
As if by magic, an entrance opens in the cliff wall behind you. Could this be what the frags meant about presenting your "invitation" at the Order of the Jewel? Let's go inside and check, but first, POINT TUBE AT FRAGS. We might need them again.
Go through the entrance and you'll find yourself in the cave-like Order of the Jewel. Walk toward the diamond-shaped plate at the bottom of the screen. Whoops! A nasty-looking Guardian appears in the ceiling of the cave. Don't try to leave the cave while that guy's around, or he'll turn you into toast. (SAVE the game and try to leave through the exit at the top of the screen. See what I mean? Now RESTORE the game and quit fooling around!)
ALTERED DESTINY: Part 4
Instead of leaving the Order, take the path at the bottom right of the screen. You'll find yourself in The Crystal Garden with Lantra, a "friendly protective creature" who grows crystals for the Order. EXAMINE LANTRA and you'll see that she's carrying a pair of pouches. EXAMINE SMALL POUCH and EXAMINE LARGE POUCH, and you'll learn that the pouches contain seeds that will grow into crystals. Well, shucks, you never know when a pair of crystal-growing seeds will come in handy, so ASK LANTRA FOR SMALL POUCH. No dice. Her crystals may need them. ASK LANTRA FOR LARGE POUCH. Same problem. Maybe if you gave Lantra something she needs, she'd reconsider. Crystals need water to grow, so GIVE SHELL TO LANTRA. (It contains the water you scooped up back in the Weird Woods, remember?) Sure enough, she shows her gratitude by giving you the large and small pouches (or rather, by dropping them on the floor next to you).
GET THE SMALL POUCH, but leave the large pouch here for the time being. THROW SMALL POUCH and it will take root on the floor, growing a fresh round crystal on the spot. GET ROUND CRYSTAL. EXAMINE ROUND CRYSTAL and you'll be told that it's shaped like a lens. Curious. Exit the screen by the path on the lower right. The exit leads to a hallway. In the middle of the hallway is a staircase. Descend the staircase and enter the door at the bottom.
Welcome to the library. The nearsighted librarian Towhee and his "Zen puppy" Otto (who looks suspiciously like a three-legged table) are here to serve your every need. (Well, a couple of them, anyway.) The library is filled with scrolls, so ASK TOWHEE FOR SCROLL. He'll send Otto to get it, stare at it myopically, and hand it to you. READ THE SCROLL. It tells an interesting story of the conflict between humans and Yulas. What's a Yula? You'll get a look at one later, or rather, at the remains of one.
As interesting as the scroll may be, it's not really going to help you win this game. There must be something else useful in the library. Maybe if you did Towhee a favor....
The old librarian is nearsighted and the round crystal that you're carrying is shaped like a lens. So, GIVE ROUND CRYSTAL TO TOWHEE. In gratitude, Towhee gives you a picture scroll. READ THE PICTURE SCROLL. It concerns the defoil herb, which changes plants into animals. You don't suppose that you're going to find one of these herbs somewhere in your wanderings, do you?
EXIT the library, climb the stairs, and exit the hallway on the left side of the screen. You're back at the entrance, where the Guardian is still glaring down malevolently from the ceiling. So, let's get out the way we got in: POINT TUBE AT PLATE and the Guardian will fade away. You'll need the frags again, so POINT TUBE AT FRAGS, and leave by the front entrance.
This is the only place you'll be needing the tube, so DROP THE TUBE outside the cave entrance. You're also finished with the scrolls (just reading them is enough); DROP THE WRITTEN SCROLL and DROP THE PICTURE SCROLL, as well. Then, exit the screen to the right and return to the Crossroads.
Head southeast; into the woods we go again. Go back to the place where you saw the hammock strung between two trees. (From the Edge of the Forest, go left, down, and right.) After all the work you've done, you deserve a rest, so LIE IN THE HAMMOCK. You'll fall asleep automatically. What can you do while you're sleeping? Well, remember what Vindah said about dreams? Follow his advice: DREAM. You'll dream about old TV shows, from "My Three Sons" to "Gilligan's Island." (Does anybody recognize the show with the two eyes hovering over the bridge? I don't.) You'll even dream about Vindah himself, who tells you how to face fear: "Stand immobile and show fear you know its source."
Finally, you'll dream about a strange blasted landscape that looks like the Forest of Dreams might look after a nuclear war. It might be worth exploring this strange landscape, but you only have time for one command before you return to the "real" world. So, WAKE UP! Instead of waking up, though, you'll astrally project right out of your sleeping body. Or is it the sleeping body that's the astral projection? Heavy Zen stuff, dude!
ALTERED DESTINY: Part 5
Go right one screen and down one screen, being careful to avoid the pools of acid. Yeah, this sure looks like the Forest of Dreams, all right. But how do you get past that cloud of green gas at the bottom of the hill? Alas, you _can't_, so go back to the screen where you left your sleeping body (up one screen and left one screen).
There sure are a lot of rocks in this place. EXAMINE ROCKS. They look precarious, eh? That pile in the center looks particularly unstable, so walk up behind it and PUSH ROCKS. The rocks fall off the cliff, forming a natural staircase; how convenient! CLIMB ROCKS and you'll find yourself at the bottom of the hill, past the green gas.
The pink rabbit-like creature in the middle of the screen is Luella Kaylef. Why is she crying? TALK TO LUELLA and she'll tell you the whole sad tale (or at least enough of it to keep the game moving), about her dead beloved whose picture now lies on the other side of the acid pools where she can't reach it. If you'll retrieve it for her, she'll give you a reward. (Now, let's be honest. You would have helped her even if she hadn't offered the reward, right? Right?)
Don't even think about walking between the acid pools. It can't be done. Instead, walk to the right of the leftmost of the two trees in the center of the screen, and CHOP LEFT TREE WITH AXE. (You may have to try this several times before the game acknowledges that you're in the right position to chop the tree.) Then, do the same with the rightmost tree (e.g., walk to the right of the tree, and CHOP RIGHT TREE WITH AXE). The trees will fall across one of the acid pits, forming a kind of bridge. Approach the fallen trees from the right side and you'll be able to walk across them. (You may have to try this several times, too.)
When you get to the picture (which is lying at the far left of the screen), GET PICTURE, and walk back across the trees. Go to Luella and GIVE PICTURE TO LUELLA. Luella will drop her mirror for you to pick up. GET MIRROR, and get the heck out of this Godforsaken place! CLIMB ROCKS, go back to your sleeping body, and SLEEP. Paradoxically, this will send you back to the real world, where you can WAKE UP. Return to the Edge of the Forest (left, up, and right) and take the rightmost path back to the Crossroads.
You'll need to travel light on your next expedition, so DROP ALL. You'll need one item, though, so GET BOWL. You can pick up the rest when you get back to the Crossroads. Take the northeast path and you'll soon arrive at the Canyon of Death.
As its name implies, the Canyon of Death is a dangerous place. In fact, you'll probably die more times in the Canyon than in the rest of this game put together, mostly from falling off cliffs and other precarious perches. While in the Canyon, follow that most ancient of adventure game admonitions: Save early, save often, or be prepared to start the sequence again from the beginning.
From The Top of a Canyon, take the path down into the canyon depths. When you enter the next screen (On a Path), don't move! See that amoeba-like wraith descending lazily toward you from the top of the screen? EXAMINE WRAITH, and you'll learn that it's actually a Fear, left behind by a dying Yula. Remember what Vindah said about standing immobile in the face of fear? That's what you're doing right now. Stand immobile until the Fear impales itself on the sharp rock next to you, and turns into a slippery stream of slime.
Continue down the path and into the next screen. Two more Fears descend on you from above. Stand immobile again and they'll do the same thing the last Fear did, only this time the resulting slime will flow into a bowl-shaped depression in the rock. Think you'll need some of that slime later in the game? Probably, but you don't have anything to put it in at the moment (the bowl is already holding popcorn), so we'll worry about that later.
There are two exits from the Canyon Fork screen (besides the entry you came in through): One is on the left side of the screen, the other is roughly in the middle. Take the one on the left, being careful not to fall off the narrow pathway that you're on. (What? You fell off and got killed? Well, you did SAVE the game like I suggested, didn't you? Didn't you?) You'll emerge on a narrow fragment of pathway high in the air. Continue along this path and into the next screen, where you'll see an odd-looking plant suspended above the path. Could this be the defoil herb you read about earlier? Talk about coincidence! GET THE HERB and retrace your steps back to the screen labeled Canyon Fork. (Players who grew up in the sixties are cautioned not to SMOKE THE HERB. This ain't that kind of game.)
This time leave the screen by the exit in the middle. You'll follow a long, twisting path that will continue for several screens. (You will also fall off this path repeatedly and die. Send all complaints to Michael Berlyn, c /o Accolade, Inc., 550 S. Winchester Blvd., Suite 200, San Jose, CA 95128 -- not to the author of this walkthru. If it helps, try to imagine how many times I had to die to write this walkthru. Kind of takes your breath away, doesn't it?)
ALTERED DESTINY: Part 6
Eventually, you will come to a graveyard filled with the bones of long-dead Yulas. Impressive beasts, weren't they? Doubtlessly they were even more impressive when they had skin. In a moment you are going to climb the bones of several Yulas, but first you'll need to take a precaution against being molested by Kleegs, peculiar creatures who dart around among the bones of the Yulas. DROP THE BOWL, and a cloud-like herd of Kleegs will descend upon it, leaving one Kleeg lying comatose (from overeating, apparently) in its wake. Let him rest for the time being.
Walk to the leg bones on the right, note the webbing wrapped around them and connecting them with other bones, and CLIMB WEB. You'll clamber up to the top of the bone pile, where you can step on to the strand of webbing that connects these bones with the ones to the left, and walk across the web. (This, incidentally, is why you dropped the rest of your inventory back at the Crossroads. The web, like the transporter that floats between the two suspended islands, can't bear much weight.)
When you enter the next screen, notice the large Yula skull in the middle and the small arrow on top of it. Could this be the jeweled arrow spoken of in song and scroll? EXAMINE ARROW and you'll see that it is. Work your way across to the arrow (dying repeatedly, as usual) and GET THE ARROW. Then, retrace your steps back to the previous screen, and CLIMB DOWN at the point where you first climbed the webbing. Once on the ground, GET THE BOWL. The Kleeg is still lying on the ground next to the bowl, comatose from his huge meal of popcorn. GET THE KLEEG, too. What are you going to do with a Kleeg? Wait and see.
Follow the path back through the canyon. Keep an eye out for that puddle of slime left behind by the dissolving Fears. When you come abreast of it (at the Canyon Fork), FILL BOWL WITH SLIME. (The bowl was full of popcorn before, but now it's empty and available for slime-toting.) Once you've got the slime, continue following the path back out of the canyon, and return to the Crossroads.
Okay, time to pick up the stuff you left at the Crossroads. However, you no longer need the axe. (It was only necessary for chopping the trees in The Forest of Dreams.) So just PICK UP MIRROR, PICK UP SWORD, then go southwest, back to the Order of the Jewel.
GET THE TUBE from where you left it in front of the cliff. POINT TUBE AT PLATE to open the door. Then DROP THE TUBE; you won't be needing it again. Enter the cave and take the lower right exit from the main entrance hall, back into The Crystal Garden. Finally, you can GET THE LARGE POUCH and go back out the way you came in. Head right outside the cave and return to the Crossroads.
Now it's time to investigate that mysterious light in the Weird Woods. Go northwest from the Crossroads and return to the Wooded Area. Go one screen north. There's the mysterious light, almost dead center on the screen, but don't go toward it, yet. Instead, go two screens to the right. See that pathway leading through the trees (or whatever those things are) to the upper right? Follow the path and...whoops! Here comes the Hoppa! He bounces across the screen and onto your head, sprinkling you with pollen. When he leaves, go back two screens to the left. (And don't dawdle. After that dose of Hoppa pollen, you're eventually going to turn into a plant. You don't want to take root until you've taken care of business, do you?)
This time, go through the exit in the middle of the screen, where the intense light is. You'll find yourself facing a nasty, axe-wielding creature named aRRaRRa across the glowing lens of a giant crystal: the Pool of Light. Looks like you're in for a fight. First, though, EXAMINE THE PLATFORM on which you are standing. It has a message inscribed on it, something about how "your form must be right." Now back to the fight. WIELD THE SWORD so that you'll be ready and move to the right. The elevated platform on which you are standing will float over to the one on which aRRaRRa is standing, and the fight will begin.
Don't be intimidated by the creature's brute strength. Force aRRaRRa off the right edge of the platform, then dive off yourself. You don't die as you fall into the glow of the crystal, the way that aRRaRRa apparently does. Does this mean that your "form" is right? The pollen sprinkled on you by the Hoppa must have had something to do with this.
You fall through the crystal and land on a mysterious staircase floating in mid-air. EAT THE HERB immediately. It will cancel the effects of the Hoppa's pollination. (The defoil herb turns plants into animals, remember?) On one of the landings of the staircase you see a mound of stones. EXAMINE MOUND and you'll see a cryptic message about how "Growth bridges the gap, seeding the path, crystallizing our differences." Now what could that mean? An image of Jonquah appears and tells you that he has something for you. But as you descend the staircase toward him, he vanishes. Fortunately, even as the image of Jonquah fades, a new flight of stairs appears at the bottom of the floating stairs.
ALTERED DESTINY: Part 7
Step on the platform. It begins to descend through a long tube with strange markings etched on its sides. EXAMINE THE MARKINGS and you'll read another cryptic message, in which the numbers "four" and "one" figure prominently. The platform eventually deposits you on the Floating Floor, which is made up of a matrix of square tiles with circles carved on them. Take the hint provided by the last message: Walk only on those tiles with one or four circles on them, until you come to a tile with no circles on it at all. This tile will move downward, elevator-like, until it leaves you on a platform above the Pool of Darkness. Next to the platform hovers yet another image of Jonquah. He gives you a Silencer and vanishes. Step off the platform and into the pool.
Next thing you know, you're back at the Pool of Light, where you fought aRRaRRa. Exit to the left, then go down two screens, and return to the Crossroads. You're finally ready to face Howler Lake. Take the southeast path from the Crossroads to the Forest of Dreams. From the Edge of the Forest, go left, down, right twice, down, and left. TURN ON THE SILENCER and take the southward path that you weren't ready to take the last time you were here. This time, the Silencer protects you from the cries of the Howlers.
Walk out onto the causeway and look across at Castle Island. That's where Helmar, your adversary, is waiting. But how are you going to get there? The causeway is in ruins and the water is full of Howlers. Wait! What's that flickering light on the island? Is someone trying to signal us? Let's SIGNAL WITH MIRROR and find out.
Sure enough, a boat (or more properly, a nonsentient creature called a Boteman) comes sailing across to meet you. Climb on board and RIDE BOTEMAN. He'll carry you back to Castle Island while Helmar watches malevolently from above.
The Boteman drops you off at a landing on Castle Island. Uh oh! What are those evil looking plants? Those are Noisomes and they can kill you with sound. Quick, before they can do anything, SQUEEZE THE KLEEG. All that gas left over from his popcorn feast will be released in an immense belch, destroying the Noisomes before they can destroy you.
Step onto the island, but watch out for certain red trees and purple undergrowth. (You'll find out quickly enough which ones to avoid, after you've died a few times.) To make yourself less, er, desirable to the red trees (if not the purple undergrowth), POUR SLIME ON SELF. (Yuck!) Head one screen to the right and enter the remains of the garden. There are two exits from the garden, both in the upper left-hand corner of the screen. Take the leftmost of the two.
Follow the short path to the screen labeled Island Center. Cut across this screen from right to left, exiting on the left. Follow the short path to the bottom of the next screen, into the screen labeled Amid the Ruins. Do a sharp U-turn around the hedges and go back into the screen labeled Gathering Place. Go up the path with the four red trees at the entrance. (They won't hurt you because you've been doused with slime.) Exit to the right and you'll finally come to the screen labeled Castle Entrance.
Walk right up to the crystal door of the castle -- the one with the large keyhole in it. UNLOCK DOOR WITH ARROW and step inside. You're now at the Castle Bottom. See that rope hanging down from above? PULL THE ROPE and start working your way up toward the castle top.
After three screens of continuous upward movement, you'll see a door set into the crystal wall. SAVE the game before you reach the door and continue upward. After two more screens, you'll come face to face with Helmar. He'll zap you with the Jewel of Light before you can do anything to fight back.
Now that you've seen what you're up against, RESTORE the game to the point right before you reached the door. As you pass the door, JUMP. You'll enter the door and land smack in the middle of a maze. Go right three screens and you'll come to a section of the maze with no obvious exit in the upper middle. Go to the middle of the screen and walk straight into the wall where the exit should be. An exit will appear, and you'll be face to face with Helmar again, but this time from a greater distance. He'll offer you a choice of weapons from your inventory. Choose the MIRROR. When he tries to strike you with a beam from the Jewel of Light, it will be reflected right back at Helmar, knocking him unconscious.
And that's it! Congratulations, P. J. Barrett! You've saved the universe! Everything from this point on is animation. Sit back and enjoy! You deserve it, if only for all those times you died in the Canyon of Death!
ALTERED DESTINY is published and distributed by Accolade.


