Armour-Geddon (Documentation)

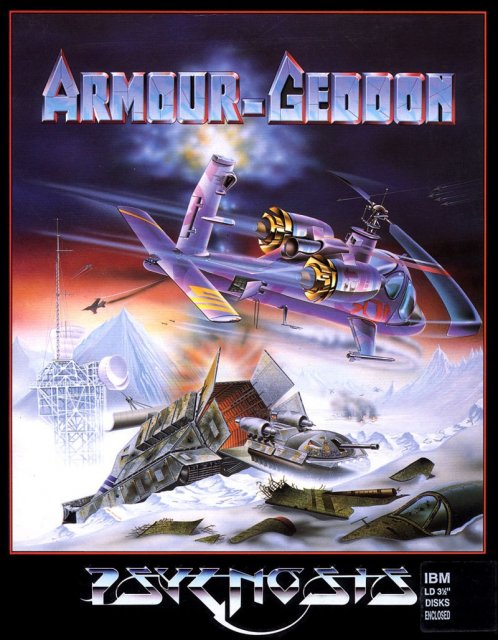
ARMOUR-GEDDON
                         KEYBOARD CONTROLS

(TOP OF KEYBOARD)

ESC: H.Q. SCREEN
F1: VEHICLE 1                      F6: VEHICLE 6
F2: VEHICLE 2                      F8: RESET RADAR
F3: VEHICLE 3                      F9: RADAR ZOOM OUT
F4: VEHICLE 4                      F10: RADAR ZOOM IN
F5: VEHICLE 5                      DEL: SHIELD DOWN
                                  HELP: SHIELD UP

(KEYBOARD MAIN)

1: BEACON 1                         7: WAYPOINT BEACON
2: BEACON 2                         8: BASE BEACON
3: BEACON 3                         -: THROTTLE DOWN
4: BEACON 4                         +: THROTTLE UP
5: BEACON 5                 BACKSPACE: BRAKE
6: BEACON 6

TAB: RAISE GUN TURRET               I: CAMERA LEFT
Q: PAYLOAD 1                        O: CAMERA RIGHT
W: WEAPON VIEW                      P: PAUSE
E: EMERGENCY BEACON                 [: CAMERA ZOOM IN
T: TARGET                           ]: CAMERA ZOOM OUT

CTRL: LOWER GUN TURRET              J: * JOYSTICK MODE
A: PAYLOAD 2                        K: * KEY MODE
S: START/STOP ENGINE                L: LIFT
F: FUEL POD                         ': CAMERA UP
G: TELE PORT                   RETURN: FIRE (KEY MODE)

Z: PAYLOAD 3                        M: MOUSE MODE
V: VDU MODE                         ,: LEFT RUDDER
B: BRAKE                            .: RIGHT RUDDER
N: NEXT MISSION                     /: CAMERA DOWN

SPACE BAR: YOKE/CURSOR TOGGLE IN KEYBOARD/JOYSTICK MODE
RIGHT ALT: FLARE

CURSOR KEYS UP, DOWN, LEFT, RIGHT: EMULATE JOYSTICK/MOUSE CONTROL
                                   IN KEY MODE

(KEYBOARD NUMERIC KEYPAD)

CAMERA CONTROLS DUPLICATED ON MAIN KEYBOARD

THE VIEWPOINTS

(: CAMERA LEFT    ): CAMERA RIGHT   /: CAMERA ZOOM IN   *: CAMERA ZOOM OUT
7: 315 DEGREES    8: O DEGREES      9: 45 DEGREES       -: CAMERA DOWN
4: 270 DEGREES    5: INTERNAL VIEW  6: 90 DEGREES       +: CAMERA UP
1: 225 DEGREES    2: 180 DEGREES    3: 135 DEGREES  ENTER: EXTERNAL 1
0: SATELLITE VIEW                   .: EXTERNAL 2

IN SHIFT KEY MODE

H.Q. SCREEN    =       SELF DESTRUCT
BEACON 1       =       TELEPOD 1
BEACON 2       =       TELEPOD 2
BEACON 3       =       TELEPOD 3
BEACON 4       =       TELEPOD 4
BEACON 5       =       TELEPOD 5
BEACON 6       =       TELEPOD 6
EXTERNAL 2     =       WEAPON VIEW
EXTERNAL 1     =       EXTERNAL 3
THROTTLE UP    =       INSTANT MAX. THROTTLE OR ZERO THROTTLE IF IN
                       REVERSE
THROTTLE DOWN  =       INSTANT MAX. REVERSE THROTTLE OR ZERO THROTTLE
                       IF IN FORWARD
PAUSE          =       PAUSE MODE WITHOUT PAUSE MESSAGE
JOYSTICK MODE  =       JOYSTICK CONTROL OF ALL SCREENS AND VEHICLES
SATELLITE VIEW =       TOWER VIEW

IN ALT KEY MODE

BEACON 1       =       FUEL POD 1
BEACON 2       =       FUEL POD 2
BEACON 3       =       FUEL POD 3
BEACON 4       =       FUEL POD 4

* AUTOMATICALLY REVERTS TO MOUSE CONTROL FOR CONTROL SCREENS AND
BACK TO SELECTED MODE FOR VEHICLE CONTROL.
INTRODUCTION
Devoid of emotion - unlike the six-strong crew - the computer onboard MSS Orestruck plots a perfect orbit around its home planet, Earth.
Having to remain onboard Orestruck for another twelve hours - for decon reasons - while being within spitting distance of home does little for the crew's morale. They've been manning the deep-space mining vessel for the last two years and want nothing more than to get off the thing. In fact the crew are so pre-occupied with preparations for going home that they fail to notice the "Attack Threat" indicator frantically flashing on the command console.
Orestruck's computer goes into standard "Panic Mode" when under attack and automatically makes ready the escape craft. Unfortunately, it fails to detect a lack of human life on the small craft at the time of its launch. The crew remain onboard, ignorant of the fast- approaching nuclear warhead. As the small craft reaches maximum velocity the crew are otherwise engaged, anticipating happy home- comings. They don't feel a thing as the missile blows the ship apart.
Pleased with the successful test firing of its weapon, the power- hungry nation responsible for the destruction of MSS Orestruck now feels confident enough to turn its weapons against the rest of the world.
ARMOUR-GEDDON
While the super powers negotiated, bargained and greased palms in an effort to overcome their differences and achieve world peace, a small, previously all-but-ignored nation decides to take over while attention was elsewhere. As the world's peace- seekers strived to ban the bomb they were given an untimely reminder of the destructive powers of nuclear weaponry.
Retaliation - of what was later described as "unreasonable strength" - against the aggressor swiftly followed; it seemed that every country with nuclear capabilities had itchy fingers: Death and destruction became the norm for the next few years, so-called civilization collapsed, cities were razed, countries were wiped out and nations were destroyed. Unsurprisingly however, some were prepared...
Man is a resilient creature: what he can't survive naturally he attempts to overcome by synthetic means, if he has the resources. While most of the human race were left to experience nuclear hostilities and a post-holocaust Mother Earth, the privileged few entered purpose-built structures to exist safely therein. The rest of the world struggled to survive outside.
However, the Sheltered Ones, as they came to be known, concluded that if conflict continued, there would be nothing left of earth to return to. Thus, as they didn't relish the idea of spending the rest of their lives in shelters, they ventured out to bring the fighting to an end. They succeeded and slowly began reconstructing the one small, habitable area left of the world.
A "civilized" society existed once again... However: a large sector of those left on the surface to face the holocaust were not impressed with the way they'd been treated; they formed a silent resistance movement, secretly worked for themselves while all the time feigning subservience... until they were ready to strike.
Using their limited resources, the resistance movement construct a powerful laser cannon whose beam, when aimed at an antediluvian tran-satellite, currently orbiting earth, will ne upsurged many times so that when bounced back down to earth it will be powerful enough to fry anything and anyone not protected. Of course the resistance movement has its protective shelters already prepared.
Human nature being what it is - and man being the trustworthy creature he is - the Sheltered Ones soon hear of the movement and its plan to fricassee them, they begin making plans to stay cool.
They learn of the existence of an ancient Neutron Bomb, the only weapon with sufficient power to destroy the beam cannon. The bomb was dismantled some time in the past, for security reasons and is now in five sections, all of which are hidden about the landscape.
THE GAME
Armour-Geddon features a massive play area of over 80km by 80km made up of fast, filled vector graphics which creatively represent mountains, lakes, buildings, vehicles and weapons. You are free to scout the play area in any or all of your vehicles your exploration is only hindered by the fuel limitations of each vehicle and the possible (or rather, very probable) attack by enemy forces.
From your headquarters deep in the bowels of the earth, you have at your disposal an arsenal of sophisticated vehicles and weapons with which to find the five sections that make up a Neutron Bomb. This bomb is very important to you as it is the only weapon powerful enough to destroy the enemy's beam cannon. Unfortunately, some time in the past the five sections that make up the bomb were scattered throughout the area, for reasons of security. You must find the sections then build and use the Neutron Bomb on the beam cannon before it is charged to full power and ready for firing.
A grid of power-lines feeds the beam cannon. To give you time to find the cannon and destroy it you must delay its reaching firing strength by destroying the power-line generators.
Controlling up to six different vehicles (simultaneously if you think you can cope!) you must survey your environment, discovering natural - and very unnatural - hazards and utilizing your resources to best deal with both. However, not only have you to find and destroy the power-lines and beam cannon but also you have to survive the aggression of the heavily-armed enemy.
To assist you in this daunting task you have at your disposal some highly advanced equipment, including:
Your Headquarters screen from where you can access all other screens - and any of your six vehicles. It also displays a grid map of the game area and vehicle positions (both enemy - shown in red - and your own - shown in white);
An Intelligence system which displays areas of the game surveyed by your vehicles and which also enables you to select waypoints for your vehicles - a waypoint is a marker placed on the map and designated to one of your six vehicles, the selected vehicle can then home in on that point via its cockpit display;
A sophisticated Research & Development team of scientists and engineers: Given the appropriate resources your scientists can develop virtually any hitherto undeveloped weapon that exists in the game (including the Neutron Bomb) and, once developed, your engineers can build the device.
Resources in stock are displayed in your Stores screen (as are all devices and vehicles). You may replenish depleting stocks of resources by pillaging destroyed enemy vehicles and installations.
To destroy the beam weapon you need to find the five sections of the Neutron Bomb, use your Research & Development team to construct it, load it on to your most suitable vehicle (the hovercraft would not be a good choice) and drop it on the building harboring the cannon. Your Stealth Bomber and Heavy Tank are the only two vehicles capable of collecting sections of the Netron Bomb. Once a section has been picked up it is automatically transported to your stores.
On the road - click on the relevant icon to access a selected vehicle. The (x) Main Window can be alternated to display either messages or a grid map of the play area - click on Map icon for map and Messages icon for messages. The grid-map shows the positions of your vehicles, enemy vehicles and in-flight weapons (as dots). The grid map may be rotated if required and it may also zoom in on selected vehicles (position cursor over the selected icon and click the right mouse button or press space bar).
From this screen, pressing 'SHIFT SATELLITE VIEW' on the keypad accesses a Tower View of surface activities.
Research & Development Screen:
From this screen you can engage your scientists to work on undeveloped devices, then - should you have sufficient of the appropriate resources - have your engineers construct them.
(i) Previous device icon, (ii) Next device icon (used to scroll through devices available) and (iii) Recycle device icon. Recycle breaks down selected devices into their component resources which are then automatically returned to Stores. Holding down the mouse button on the icon increases the recycling speed. Partially manufactured devices take recycling precedence over complete items held in store. Any vehicle destroyed whilst in the elevator is automatically sent underground for recycling.
(iv) Graphic Display of chosen vehicle or weapon with (v) Device Number, (vi) Device Name, how far device is developed (%), the percentage of each unit (vii) Manufactured, total (viii) Number of units in stock. (ix) Unit Weight, the number of (x) Scientists currently working on development, the number of (xi) Engineers currently manufacturing, Icon to (xii) Increase & (xiii) Decrease manpower. Number of (xiv) Available Scientists, Number of (xv) Available Engineers, (xvi) HQ icon - click on this, or press 'HQ SCREEN', to return to the Headquarters Screen.
Intelligence Screen (only displays areas surveyed): Survey the game area and fix waypoints for your vehicles.
(i) Map area;
(ii) Zoom In for greater detail of the surrounding area - click on the icon until the magnification is at the required strength.
Move your viewpoint (iv) Up (North), (v) Down (South), (vi) Left (West) and (vii) Right (East) - click on the icon until you're at the required position.
Setting waypoints: To set a waypoint, first select a vehicle by clicking on the appropriate Vehicle Icon to highlight it (* see below for more details) then move your cursor to the required area on the map and click the left-hand mouse button - a crosshair confirms that this area is now a waypoint and a number (1 to 6) confirms the selected vehicle. Placing the cursor in the map area then clicking the right-hand mouse button centralizes the point under the cursor. Keeping the cursor off-center and holding down the right-hand mouse button will scroll the map. * Clicking the left mouse button on a selected vehicle icon centers the map on that vehicle and selects it for a waypoint, clicking the right mouse button on a selected vehicle icon selects it for a waypoint without having the map centered on it.
(viii) Vehicle Icons: any may be selected.
(ix) Base Icon: click on this icon to center the map area on your base.
(x) HQ Icon: click on this icon, or press 'HQ SCREEN', to return to HQ screen.
Equipment Screen:
Select a suitable vehicle for the task at hand then load it with appropriate equipment:
(i) Roster of active vehicles - icons highlight when a vehicle is acivated - click on an icon to select a vehicle for arming or piloting.
(ii) Vehicle Graphic window - to select a vehicle for piloting, display your chosen vehicle in the Accessory Graphic window (click on the arrows above this window to scroll through available vehicles) then click on the vehicle, hold down the mouse button and drag its icon to the Vehicle Graphic window. The Accessory Graphic window now displays devices available for your selected vehicle.
To arm your vehicle, use the arrows above the Accessory Graphic window to scroll through the devices available in stock then, when a suitable device is shown in the window, click on it and drag its icon to the Vehicle Graphic window. One of the three payload area displays the device icon to confirm it has been successfully loaded on to your vehicle.
Select vehicle's (iii) Payload (maximum of three items).
(iv) Accessory Graphic window.
(v) Next and (vi) Previous device arrows - click on these to scroll through devices currently in stock.
(vii) Pilot Vehicle icon: click on this to transport your selected vehicle, by elevator, to the surface, ready for piloting.
(viii) Weight of selected vehicles.
(ix) Number of devices/vehicles currently in stock.
(x) Weight of device/vehicle currently highlighted in Accessory Graphic.
(xi) HQ icon - click on this, or press 'HQ SCREEN', to return to the headquarters screen. You can return individual devices to your stores by clicking on its payload icon and dragging it back to the Accessory Graphic window. You may also return vehicles complete with all payloads to your stores in a single move by clicking on the Vehicle Graphic window and dragging the vehicle icon back to the Accessory Graphic window.
Stores Screen:
See what's in store...
(i) Previous & (ii) Next item icons - click on these to scroll through devices currently in stock.
(iii) Name of selected device/vehicle.
(iv) Weight of selected device/vehicle.
(v) Amount of selected device/vehicle currently in stock and information on it.
(vi) Graphic representation of device/vehicle.
(vii) HQ icon - click on this, or press 'HQ SCREEN', to return to the Headquarters screen.
YOUR VEHICLES

Ground Vehicles

Light Tank

Primary Uses: High-speed hit-and-run missions
Evaluation:
Speed: Good
Maneuvrability: Good
Firepower: Low/Medium
Durability: Good
Range: 43 miles
Top Speed: 102 mph (cross country)
Weight (unladen): 30000 kg
Maximum Load: Unlimited
Maximum Fuel: 3072 kg
Weapon Capabilities: Shells, Laser
Non-Weapon Capabilities: Night-Sight

Heavy Tank

Primary Uses: Collection of Neutron Bomb parts (automatically
transported to base on collection).
Evaluation:
Speed: Poor
Maneuvrability: Poor
Firepower: Good
Durability: Good/Very Good
Range: 28 miles
Top Speed: 68 mph (cross country)
Weight (unladen): 50000 kg
Maximum Load: Unlimited
Maximum Fuel: 3072 kg
Weapon Capabilities: Shells, Laser, FFRs, Neutron Bomb
Non-Weapon Capabilities: Night-Sight, Cloaker

Hovercraft

Evaluation:
Speed: Good
Maneuvrability: Medium
Firepower: Good
Durability: Poor
Range: 30 miles
Top Speed: 140 mph (approx)
Weight (unladen): 5000 kg
Maximum Load: Unlimited
Maximum Fuel: 3072 kg
Weapon Capabilities: Laser, FFRs, Missile
Non-Weapon Capabilities: Night-Sight, Cloaker
Primary Uses: Swift survey of islands to seek and find Neutron
Bomb parts, Ground Attack

Ground Vehicle Cockpit (example)

(i) Engine Status Indicator (on or off)
(ii) Radar detection Warning Light
(iii) Missile Lock Warning Light
(iv) Payload 1 - highlights when selected
(v) Payload 2 - highlights when selected
(vi) Payload 3 - highlights when selected
(vii) Amount of weapon 1 available
(viii) Amount of weapon 2 available
(ix) Amount of weapon 3 available
(x) Shield Recharge Rate
(xi) Head-Up Display
(xii) Weapon Sight
(xiii) Missile Lock Indicator
(xiv) Target Lock Indicator
(xv) Current Weapon
(xvi) Velocity (mph)
(xvii) Shield Strength
(xviii) Number of flares available
(xix) Fuel Gauge
(xx) Throttle (forward and reverse) - no reverse thrust on hovercraft
(xxi) Compass
(xxii) Radar (range variable from 1 to 32 km)
(xxiii) Information Panel: Provides various information (accessed via
the 'VDU MODE' key) including;
     a) Speed and Radar Range; b) Payload and Fuel Weights; c) Current
Mission Text (xxiv) Vehicle access icons: click on the appropriate
icon to take control of any one of your other activated vehicles.

Ground Vehicle Controls

Joystick (self-centering)

Forward:              increase throttle
Back:                 negative throttle
Left:                 turn left
Right:                turn right
Fire:                 engage highlighted payload

Mouse

Push Forward:         increase throttle
Pull Back:            negative throttle
Move Left:            turn left
Move Right:           turn right
Left Button:          engage highlighted payload
Right Button:         toggles between controlling yoke & cursor

Keys

Cursor up:            Increase throttle
Cursor down:          Negative throttle
Cursor left:          Turn left
Cursor right:         Turn right
Carriage return:      Engage highlighted payload
Spacebar:             Toggles between controlling Yoke & Cursor

Other relevant keys:

Start/Stop Engine:    Starts your engine
Throttle Up:          Increases throttle
Throttle Down:        Decrease throttle
Shift Throttle Up:    Instant maximum throttle (or zero throttle if in
                      reverse)
Shift Throttle Down:  Instant maximum reverse throttle (or zero throttle
                      if in forward)
Raise gun Turret:     Raise Gun turret
Lower Gun Turret:     Lower gun turret
HQ Screen:            Return to HQ screen

Damage taken to your vehicles is indicated by yellow lights alongside
equipment in your cockpit - minor damage is indicated by a constant
yellow light, device inoperative indicated by flashing yellow light.

Air Vehicles

Helicopter

Primary Uses: Ground attack
Evaluation:
Speed: Good
Maneuvrability: Good
Firepower: Good
Durability: Medium/High
Range: 73 miles
Top Speed: 320 mph (ground level)
Ceiling: 8400 ft (in Hover and unladen)
Rate of Climb: 73 fps (unladen)
Weight (unladen): 4000 kg
Maximum Load: Total take-off weight 8500 kg
Maximum Fuel (internal): 832 kg
Weapon Capabilities: Laser, FFRs, Missiles
Non-Weapon Capabilities: Night-Sight, Drop Tanks

Stealth Fighter

Primary Uses: Swift Air and Ground Attack
Evaluation:
Speed: Excellent
Maneuvrability: High
Firepower: Very Good (air and ground attack)
Durability: Low
Range: 170 miles - full thrust and unladen
Top Speed: 890 mph (level flight)
Ceiling: 48000 ft
Rate of Climb: 500 fps (ground level)
Weight (unladen): 4875 kg
Maximum Load: 5000 kg (safe)
Maximum Fuel: 3072 kg
Weapon Capabilities: Laser, Missiles, Bombs, FFRs
Non-Weapon Capabilities: Night-Sight, Cloaker, Drop Tank

Stealth Bomber

Primary Uses: Collection of Neutron Bomb parts (automatically
transported to base on collection) and air delivery of Neutron Bomb
Evaluation:
Speed: Good
Maneuvrability: Medium
Firepower: Good for ground attack, Poor for air attack
Durability: Medium
Range: 106 miles - full throttle, unladen and at ground level
Top Speed: 475 mph (unladen)
Ceiling: 36700 ft (unladen)
Rate of Climb: 345 fps (unladen)
Weight (unladen): 10150 kg
Maximum Load: 10000 kg (safe)
Maximum Fuel: 6144 kg
Weapon Capabilities: Bombs, FFRs
Non-Weapon Capabilities: Night-Sight, Cloaker, Drop Tank, Fuel Pod,
Telepod

Air Vehicle Cockpit (example)

(i) Engine Status Indicator
(ii) Radar Detection Warning Light
(iii) Missile Lock Warning Light
(iv) Stall Warning Light - also audible - (not applicable to helicopter)
(v) Payload 1 - highlights when selected
(vi) Payload 2 - highlights when selected
(vii) Payload 3 - highlights when selected
(viii) Amount of payload 1 available
(ix) Amount of payload 2 available
(x) Amount of payload 3 available
(xi) Head Up Display
(xii) Scrolling Altitude Bar
(xiii) Altitude
(xiv) Weapon Sight
(xv) Missile Lock Indicator
(xvi) Target Lock Indicator
(xvii) Current Weapon
(xviii) Velocity (mph)
(xix) Shield Recharge Rate   (xx) Shield Strength
(xxi) Number of flares       (xxii) Fuel Gauge
(xxiii) Throttle             (xxiv) Compass
(xxv) Radar (range variable from 1 to 32 km)
(xxvi) Information Panel: Provides various information (accessed
via the 'VDU MODE' key) including: a) Speed, Altitude, Radar Range
and Brake Status; b) Payload and Fuel Weights; c) Current Mission
Text
(xxvii) Vehicle access icons: click on the appropriate icon to take
control of any one of your other activated vehicles.

Aircraft Controls

Stealth Air Vehicles

Joystick (self-centering)

Forward:              Dive
Back:                 Climb
Left:                 Bank left
Right:                Bank right
Fire:                 Engage highlighted payload

Mouse

Push Forward:         Dive
Pull Back:            Climb
Move Left:            Bank left
Move Right:           Bank right
Left Button:          Engage highlighted payload
Right Button:         Toggles between controlling Yoke & Cursor

Keys

Cursor up:            Dive
Cursor down:          Climb
Cursor left:          Bank left
Cursor right:         Bnak right
Carriage return:      Engage highlighted payload
Spacebar:             Toggles between controlling Yoke & Cursor
Left Rudder:          Left rudder
Right Rudder:         Right rudder

Other relevant keys:

Start/Stop Engine:    Starts your engine
Throttle Up:          Increases throttle
Throttle Down:        Decrease throttle
Shift Throttle Up:    Instant maximum throttle (or zero throttle if in
                      reverse)
Shift Throttle Down:  Instant maximum reverse throttle (or zero throttle
                      if in forward)
HQ Screen:            Return to HQ screen

Helicopter

Joystick (self-centering)

Forward:              Lower nose
Back:                 Raise nose
Left:                 Bank left

Right:                Bank right
Fire:                 Engage highlighted payload

Mouse

Push Forward:         Lower nose
Pull Back:            Raise nose
Move Left:            Bank left
Move Right:           Bank right
Left Button:          Engage highlighted payload
Right Button:         Toggles between controlling Yoke & Cursor

Keys

Cursor up:            Lower nose
Cursor down:          Raise nose
Cursor left:          Bank left
Cursor right:         Bnak right
Carriage return:      Engage highlighted payload
Spacebar:             Toggles between controlling Yoke & Cursor
                      (Keyboard and Joystick Mode only)
'Left Rudder'         Left rudder - only effective below 40 mph
'Right Rudder'        Right rudder - only effective below 40 mph

Other relevant keys:

Start/Stop Engine:    Starts your engine
Throttle Up:          Increases throttle
Throttle Down:        Decrease throttle
Shift Throttle Up:    Instant maximum throttle (or zero throttle if in
                      reverse)
Shift Throttle Down:  Instant maximum reverse throttle (or zero throttle
                      if in forward)
HQ Screen:            Return to HQ screen
As in-flight unattended aircraft will level off and circle until you once more take control of it (or until it is destroyed by enemy fire). Should it have an activated waypoint it will fly to it and then circle until you re-take control.
Damage taken to your vehicles is indicated by yellow lights alongside equipment in your cockpit - the more the yellow lights flash, the greater the damage.
Weapons Available To You:
Laser Beam: Medium range, relatively weak but sufficient against soft-skin vehicles. Weight: 100kg.
Shells: 80 per per payload. Difficult to judge their range. They contain a high explosive warhead which is effective against all vehicles. Weight: 10 kg.
Free Fall Bomb: 10 per payload. When selected, a CCIP (Continuously Computed Impact Point - indicates where the bomb will hit) marker is displayed on-screen. Quite accurate when used with your bomb sight. Used for high-level bombing. After release it is fused after approximately 3 seconds. Weight: 750 kg.
Retarded Bomb: 10 per payload. Used for low-level bombing by your Stealth Fighter. Its parachute allows deliverer to escape blast area. Does not contain as large a charge as the Free Fall Bomb. Weight 250 kg.
Rockets (FFRs): 40 per payload. Harder hitting than laser fire and have a greater range. They are fin stabilized; fins are deployed soon after launch. Weight: 25 kg.
Missiles: 8 per payload. Range is 1000m. IR homing missiles (feature scanning heat seeker which automatically targets potential prey). Best fired from behind a moving target, they attempt to calculate target's speed and the most suitable closing speed. If it loses lock it will circle until it finds a similar IR signature. Weight: 120 kg.
Non-weapon devices
Beacons: Use to trace your other activated vehicles, fuel pods, your base, telepods and waypoints (see keyboard plan for details). When selected, a Beacon Indicator is displayed on-screen. Your on-board computer can calculate a beacon's range up to 60 km away.
Night-Sight - Infra-red optical utility, enables vehicles to 'see' in the dark. Its effect is lessened during daylight. Weight: 50 kg.
Flares - May be used for distress signals but are predominantly used to confuse on-coming enemy missiles.
Drop Tanks - Attaching up to three drop tanks (dependant on availability) greatly increases a vehicle's range. Your on-board computer automatically selects these externally carried tanks as initial sources of fuel. Tanks may be ejected from your (airborne) vehicle by highlighting it on the cockpit screen and pressing fire. A tank that contains fuel when ejected explodes on contact with the ground. Full tanks weigh in excess of 800 kg and greatly affect aircraft maneuvrability.
Cloaking Device - Using this renders you 'invisible' to the enemy. However, your vehicle can still be traced by missiles locked on to you before you engaged the device.
Use sparingly as this device is a heavy drain on your fuel. Weight: 500 kg.
Telepod - May only be carried and dropped at its destination by your Stealth Bomber. Up to six may be in operation at one time. They are used to teleport from one location to another. To use a Telepod: position your vehicle below it and press 'TELEPORT' on the keyboard. Weight: 8000 kg.
Fuelpod - May only be carried and dropped at its destination by your Stealth Bomber. Fuelpods are used to re-fuel any of your vehicles that can reach them. To use a Fuelpod: Drive up to it and press 'FUEL POD' on the keyboard. Weight: 8000 kg.
Resources available to you:
Tritinium: Used for manufacture of fuel compunds.
Xelinium: Used for manufacture of explosives.
Maxinium: Used for manufacture of electronics (optical processors and lasers) and N-space products such as Teleport and Cloker.
Outinium: Used for manufacture of all weapon and vehicle body shells.
Known Enemy Vehicles (limited data):
Fighter Planes:
Attributes: Highly maneuvrable, dangerous and deadly.
Max Speed: Unknown.
Weapon Capabilities: Bombs, Lasers and Missiles - enemy aircraft carrying bombs will break off their attack if their target becomes airborne.
Enemy vehicles carry two weapon payloads, when their first payload runs out they use their second payload. When all weapons have been used the enemy vehicle retreats.
Floaters:
Attributes: Form a protection-zone pattern from which they attack. Limited range.
Weapon Capabilities: Missiles and Normal Bombs.
For Keyboard Controls, refer to separate pull-out sheet
The viewpoints, refer to right-hand side of pull-out sheet
A piloted vehicle may be considered from outside using the keys on the keypad.
These keys also relate to the different views available from within vehicle cockpits, providing the pilot with an all-round view of his surroundings.
There is also a satellite view, centered on your current vehicle, it may be zoomed in to or out of using the 'CAMERA UP' and 'CAMERA DOWN' keys on the keypad. This view not only shows your vehicle in relation to its surroundings but also displays current velocity and altitude, if applicable.
Certain weapons may be tracked by camera: Missiles, Rockets, Retarded Bombs and Normal Bombs. This view is accessed via the 'SHIFT EXTERNAL 2' on your keypad.
The Two-Player Game (requires 2 machines)
Any combination of Amiga and/or Atari ST can be connected - via a null-modem serial link - to enable two players to experience Armour-Geddon simultaneously.
If the other player is controlling a vehicle, an icon is displayed above its slot to indicate that it is currently unavailable to you.
Should any RS232 errors occur a suitable message appears at the top of the main screen and the RS232 link is terminated - press any key to continue.
HINTS
A Guide to finding the first section of the Neutron Bomb...
From the Headquarters Screen go to Intelligence Screen and select Vehicle 1. Click on the Base icon to center the map on your base and zoom in slightly (click on the Zoom In icon).
Click on the right icon to pan right until you see an airstrip. Move your cursor over the airstrip and click on it with the left mouse button - a crosshair should appear over the airstrip, this is now Vehicle's 1 Waypoint Marker.
Go back to your Headquarters Screen (press 'HQ SCREEN' key or click on the HQ icon) and select Equipment Screen. Click on the right arrow above the Accessory Graphic until a fighter is shown in the Accessory Graphic window. Now move your cursor over the fighter then click the left mouse button and drag the fighter icon left to the Vehicle Graphic window and release the mouse button.
The Accessory Graphic window now shows payloads available to your fighter. Move your cursor over the laser then drag it to the fighter and release the mouse button (the top payload icon should now hold the laser graphic). Now click on the arrows above the Accessory Graphic until Missiles are displayed. Arm the fighter with missiles then night-sight using the same procedure you used for the lasers.
Click on the Pilot Vehicle icon to get the fighter to surface.
You will now find yourself sitting in the cockpit ready for action.
Press the 'WAYPOINT BEACON' key to activate your Waypoint Navigation. A small indicator appears on-screen (above your Engine Status indicator) to point the way to your target. This indicator is a circle with arrows that indicate whether you should turn left or right, climb or descend to find your waypoint target. When all four arrows are visible you are heading straight for your destination.
The distance to the waypoint is shown on the VDU.
Power your shields up (press the SHIELD UP key and hold it down) in case of attack.
Start your engine (press the 'START ENGINE' key), throttle up (press the 'THROTTLE UP' key) and taxi to a runway, engage full throttle (with the 'THROTTLE UP' key) and take off (pull back on your joystick, press the up arrow or pull your mouse back, depending on which control method you are using).
Navigate the fighter to your target using the waypoint indicator - all four directions are highlighted when you're on the correct heading.
Before reaching your target, arm you missiles - press the payload key appertaining to the position of your missiles to highlight the payload icon.
As you approach the airfield your missile targeting system should detect some enemy ground installations. When the seeker is locked on target - your square targeting display is within your round targeting display - its tone changes to indicate the fact. You may fire when ready.
Ensure your aircraft is in no danger of crashing and you can watch the missile from the weapon camera viewpoint (press 'SHIFT EXTERNAL 2' - on the keypad).
Should you run out of missiles before all enemy installations are destroyed, select your laser - press the payload key appertaining to the position of your laser - and attempt to strafe their defenses.
Should an enemy missile lock on to you, launch flares (press the 'FLARE' key) and attempt to out-maneuver it.
After destroying the ground defenses press 'BASE BEACON' to activate your Base Waypoint.
Land your fighter, taxi to an elevator and retrieve the vehicle (press the 'LIFT' key).
Select a Heavy Tank for slot 2.
Set up the waypoint as before and arm the tank - you shouldn't meet any enemy resistance but you can never be too careful.
Drive the tank to the desired airstrip and pick up the Neutron Bomb segment by driving over it. As soon as the device is retrieved it is automatically transported back to base by the onboard LVPT (Large Vehicle Portable Teleport) - only carried by Heavy Tanks and Stealth Bombers.
You should now have successfully collected the first section of the Neutron Bomb.
Should you wish to return the tank to base then press 'BASE BEACON' for Base Waypoint and drive home.
The current mission text (on VDU mode 2) will have updated to reflect the completed mission.
Practice makes perfect:
To help you hone your attack skills there is a target range due west of your base... the targets don't fight back!
End.


