How to Copy a GD with a CDROM

.:How to Copy a GD with a CDROM:.
- Introduction
- 1.1 Preparing the Drive
- Tools:
- 2.1 CDRWin
- 2.2 GD Lister
- 2.3 Extract
- 2.4 Isofix
- 2.5 Isobuster
- 2.6 CloneCD
- 122 Minute TOCs
- 3.1 Data TOC
- 3.2 Audio TOC
- Explaining the Method
- 4.1 Extracting the TOC
- 4.2 Extracting the Data Tracks
- 4.3 Extracting the Audio Tracks
- 4.4 Extracting the ip.bin
1. Introduction
This method consists of a "swap-trick", it´s more or less the same method used on the Saturn or PSX before the existence of mod-chips, it basically consists on cheating the drive so it doesn't detect we've changed the CD.
GD-ROMs are nothing more than regular CDs with a higher data density, that is, the data is recorded closer together, but they're not made of any special material nor recorded in any different way than a normal CD-R would, so... How do we get 1 gigabyte capacity? Simple, by eliminating error correction and redundance, this makes it possible to use only a single byte of space in order to save a single byte of data on disc.
Being that GDs are nothing more than regular CD media, it is understandable that a CD/DVD drive would be capable of reading them without a problem, as we'll soon find out.
1.1 Preparing the Drive
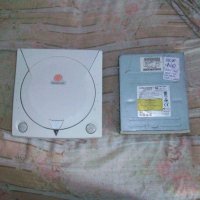
The first thing we need is a CD-R drive, buy a cheap one, something you won't mind taking apart. Also, it MUST be capable of reading 80 min CDs/CD-RW without a problem and with digital audio extraction. Although I haven't tried this out with a DVD drive yet, it should do even better, because the laser autoadjusts to read different formats. The drive I'm using is an Artec 50x, another one that works is the Acer 32x.
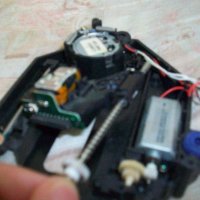
OK, once we have our drive, we need to adapt it. The first thing to do is to take off the drive's cover (the outer shell), both the upper and lower plates and if necessary, freeing the CD bay (take off the disc tray).
Once we have our "naked" drive, we take off the magnetic sheet, which fixes and centers the CD within the drive, in my case (Artec 50x), it's the strip that goes over the drive from one end to the other with a circle in the center, this circle is magnetized. Right, we take off the screws and keep this sheet aside, it should be easy to take off whenever we like. We finally have our drive ready, no need to say we should have full access to the top of the CD whenever we need, so don't shove the drive inside your computer case.
2. Tools
Here, I shall describe the necessary tools for extracting files from a GD-ROM. I'll only give a brief description of each tool, their specific use shall be unveiled once we get to the part where they are needed.
2.1 CDRWin
Probably the best CD burning software there is, it's the key to our method. We'll need it to read the GD-ROM, because of its capability to extract sectors.
2.2 GD Lister
This program, created by Yursoft and translated by me (StateS), is used to detect where each track within the disc starts and ends, parting from an ip.bin file or an ISO image containing a GD-ROM TOC. Very useful!
2.3 Extract
With this application, we'll be able to extract the specified files from any ISO image, using its TOC.
2.4 Isofix
This tool will prove very useful if we've been capable (a rare case indeed) of creating a complete GD-ROM image, even if it's split in two parts. It assigns LBA values to an image file.
2.5 Isobuster
Just in case you don't know what this does, I'll explain a bit: It extracts individual files from a buttload of image file formats, including .ISO... In our case, it fulfills the same functions as Extract.
2.6 CloneCD
We'll need this to make the 122 minute ISOs and burn them on cd's.
3. 122 Minute TOCs
Right, as I've explained before, the method consists of a swap-trick. We need to fool the drive so it thinks it's reading a CD-ROM, NOT a GD-ROM. A GD-ROM has 1GB data capacity, 549150 sectors, 122 minutes, and has the following track structure:
- Dummy data track (sectors 0-x)
- Audio track (sectors x-y) (there may be none, as well)
- Valid data track (sectors y-549150)
Knowing this, and keeping in mind that the max capacity for a regular CD-ROM is 80 minutes, we could be driving ourselves crazy with one simple question "How do we extract the sectors where all of the data is held?".
The solution is... CloneCD images include a .ccd file that is the equivalent to CDRWin's .cue files. That is, it tells where each track within a CD starts and where it ends. OK, this file may be modified using whatever text editor you like, so with a little bit of know-how, we'll be able to modify certain data and convert a 72 minute TOC into a 122 minute TOC.
Along with this tutorial you will find a 122 minute data TOC and an audio TOC, but it's interesting to know how to modify a TOC in order to achieve this.
3.1 Data TOCs
To create a data TOC, we need a Mode 1 image made with CloneCD; CloneCD images are composed of 3 files: a .ccd, a .img and a .sub, the one we need is the .ccd, which, despite its file extension, is no more than a Windows .ini file. The file is divided into sections, the first two sections contain settings relative to the software version and disc structure, and then we have as many sections as we do tracks within the image. The one we're interested in is entry number 2: more specifically, the PLBA field of this entry, we must modify the value of this field and change it to 549150, which is the exact number of sectors in a GD-ROM. It should end up looking like this:
[Entry 2]
Session=1
Point=0xa2
ADR=0x01
Control=0x04
TrackNo=0
AMin=0
ASec=0
AFrame=0
ALBA=-150
Zero=0
PMin=122
PSec=4
PFrame=01
PLBA=549150 < --
Once we've modified the .ccd, we burn the image using CloneCD. This will give us an error message, stating that the image's TOC is incorrect and will offer the choice of fixing it or leaving it intact. It's quite evident we should tell the application to keep using the current TOC without making any modifications; let it keep its fixes to itself...
Once the image is burned, we now have a "Trap Disc" which lets us read all the way to sector 549150, so now we'll be able to extract the full GD!
3.2 Audio TOCs
Evidently, with the image we have right now we can only extract data in Mode 1 (2048), so now we need a "Trap Disc" for audio extraction. The process and modifications are exactly the same, only with a CloneCD image in Audio format.
4. Explaining the Method
Now that we have both our modified TOCs, CDRWin and the rest of the tools, we can start ripping GDs! My tests were made with DreamON 10, which is a SEGA demo disc.
Before we go on, make sure you have easy access to your "naked" drive; once we have our system ready, Windows running, and our drive detected, we can start the process.
4.1 Extracting the TOC
This is the easiest step in the whole process, it consists in creating an image that contains the first 500 sectors of the disc, the GD-ROM's TOC is contained within. In order to achieve this, we must do the following: Insert the Data "Trap Disc" in your drive, start CDRWin and choose the third option (Extract Disc/Tracks/Sectors), hit the TOC button and read the Trap Disc's TOC; while we're waiting for CDRWin to finish reading the cd, choose the following options:
- Extraction Mode: Select sectors.
- Image filename: Any name you want, for example: toc.iso
- File format: Automatic
- Start sector: 45000
- End sector: 46000
- Datatype: Data Mode 1 (2048)
- Error recovery: Abort
- Jitter Correction: Auto
- Data Speed: 4x
- Audio Speed: 4x
- Read Retry Count: 0
- Subcode Threshold: 300
We shold have CDRWin configured as shown in the following image:
Once we have CDRWin configured, we have to wait for the drive's motor and CD to stop spinning. Once the motor stops, we take off the metallic strip from the top of the CD (the one that's magnetized), we remove our trap disc and place our desired GD-ROM, we place the metallic strip back on and start extracting. If all goes well, the disc should not make any noises and a little bit later we'll have an image of approximately 2 MB in size.
Once we've extracted our TOC image, we need to know where each track starts and ends in order to extract the audio/data tracks. To do this, we need to open up our brand new TOC image using GD Lister. We should be looking at the following:
As we can see, there are a total of 3 tracks, the first data track, which is of no use to us, is a dummy file that pushes the data onto the end of the disc, this cuts the loading time in the games by a bit. The second track is audio and the one at the end is our data track, which contains all the game files. In this case, the key sectors are 227454, which is the beginning of the data track and 549150, which is the final part of the data track and the GD-ROM itself. We now know where to start the data extraction without fear of messing things up.
IMPORTANT: DO NOT change the CD until the motor has stopped completely.
4.2 Extracting the Data Tracks
Once we know the beginning sector of the data track, the only thing we need to do is tell CDRWin to extract from that sector and all the way to the end of the disc. I don't know why, but if the data track starts before sector 370000 (more or less), we have to split it into two, otherwise, the drive won't extract the data all the way to the end. In this case, we split the image into TWO images: one that goes from 227454 to 369999 and another one from 370000 to 549150. To extract these images, we use the same configuration we used when extracting the TOC. Just like before, if the GD-ROM doesn't make any weird noises, then everything's fine. If we're capable of extracting all the way to sector 549150, then we're almost done...
Now we have two .ISO files with no TOC and on top of that: split! I know this doesn't look too good, but we can merge the two isos into one and still use the TOC we extracted as the resulting iso's own TOC. To merge both pieces, we use a simple DOS command called copy with the following syntax:
copy /b img_pc01.iso+img_pc02.iso new_img.isoAfter a little while, we'll have ourselves a complete ISO named new_img.iso. The ISO is STILL missing the TOC, so we can't extract any files with ISOBuster yet... What we're gonna do now is: use our extract tool to use our first TOC as the merged ISOs own TOC. Here are the syntaxes needed (in DOS):
extract toc.iso new_img.iso 227604 (227454+150)This particular command will extract all the files from the ISO which contains the data image we extracted earlier; we must add 150 sectors because extract doesn't count the sectors assigned to the TOC.
Once extract finishes, we should have a folder with all the files from the GD-ROM, here are the files and folders from the DreamON 10 Demo Disc:
And that's it! We've succesfully extracted all the files from our GD-ROM. All we need to take care of now are the audio tracks, if there are any... Don't worry, the process is somewhat easier than extracting the data tracks...
4.3 Extracting the Audio Tracks
Once we have the data from our GD-ROM, we can start ripping audio tracks. First of all we need to write down where each audio track starts and where it ends, using our GD Lister to read the respective TOC. Only after this do we take out our GD-ROM and place our audio "Trap Disc" into the drive and make CDRWin read it's TOC; once our drive's motor and disc come to a stop, we take out our trap disc and insert our GD-ROM once more, reuse the options used to extract the data track except for the following options in CDRWin:
- File Format: WAVE
- Jitter correction: Auto
- Datatype: Audio (2352)
We specify the start and end sectors for each track and proceed to extract each one individually; once finsihed, we'll have as many .WAV files as the number of audio tracks in our GD-ROM.
4.4 Extracting the ip.bin
We're almost done! We just need to take care of one more thing: extracting the ip.bin, which is the bootstrap in all our DreamCast games and it indicates which file should be executed first, driver/video mode compatibility, game manufacturer and some other stuff. This file is essential in order to make any Dreamcast game work. If we're lucky, the file will be included as another file among the ones we extracted before, if not, then we've got work to do...
Although it's not the isofix's primary function, this program can extract a game's ip.bin when applied on an image file containing the game's TOC: it extracts into a file named boot.bin.
When we start up this program, it asks for the image file we wish to patch, as well as the LBA value from which we want to start the procedure; this value is 45000. Once isofix finishes, we'll have two files: a tmp.iso - which we don't care for, and a boot.bin - which we need to rename to ip.bin and use as a boot sequence for the game we want to burn.


