xbox 360: Three Red Lights of Death Repair Manual
Reasons why this works
When Microsoft designed the 360, they chose a slightly unusual way of mounting the heat sinks to the processors. When the console is running, there is a tremendous amount of heat build up inside the case.
This causes the motherboard to flex against theX-Clamp support plastic (see picture 1) which in turn can cause the soldered joints on the processors to come away from the motherboard itself. This results in the Red Lights of Death.
Due to the inefficient design of the heat sink clamping method, this is a very large Although Microsoft haven’t (as of yet) come up with a decent design fix. On the latest ‘Elite’ versions of the console they have used epoxy resin to ‘glue’ the corners of the processors down to stop the flexing that causes this error (see picture 2). Whether their fix will stand the test of time remains to be seen.
What the modification contained in this manual achieves is to alleviate board flexing and apply uniform pressure to the processors. This uniform pressure is enough to ‘remake’ the faulty joints resulting in a working console. Also, because the pressure on the processors is uniform the heat sinks do a much better job of dissipating the heat build up.
Getting prepared
To perform this modification, you require some tools and some specific screws and washers. If you have purchased this document as part of the repair kit, you will have everything you need to perform this modification.
Needed Tools
- T8 Torx Screwdriver
- T10 Torx Screwdriver
- 5mm Flat washers (B&Q avf-064968)
- 5mm x0.8x10 machine screws (B&Q avf-069918) 1 Arctic Silver Thermal Compound
- Thin Terminal Screwdriver
- Wooden Skewer or similar (must be THIN)
Opening the case
Firstly, remove the front face plate from your Xbox: Take a look at the front of the Xbox 360 and insert your thumb into the door that covers the two USB ports on the right of the unit.
With your other hand squeezing the upper and lower sides of the face plate, pull out the face plate with your thumb. With not much effort, the face plate should come away from the unit with ease. I wouldn’t force it however –if it doesn’t want to come off easily it will be catching on something. You don’t want a trashed console case after all your efforts.
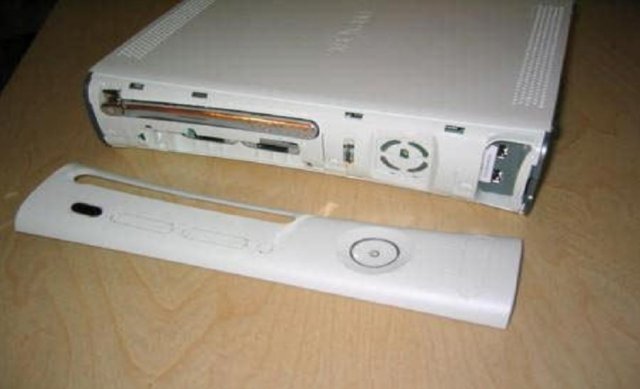
After the face plate has been pulled off you will see a silver Microsoft sticker covering both halve of the case; remove this – goodbye warranty!
There are four clips locking the top half of the case to the bottom half.
Do not attempt to wedge the clips out at this point, we need to remove both grey plastic end plates first.
With care, gently bend outwards, the right grey ventilation shield on the right side of the unit so that you can see a bit inside. You will notice that the grey side piece attaches to both the bottom and top white chassis.
Look through the holes on top of the unit to locate the areas where the grey side pieces attaches to the white housing. What you need to do is take the thin skewer and push down, through the white holes (located on both the top and bottom of the Xbox 360) where the clips of the grey side pieces connect.
Slowly pull out the grey pieces away from the unit while unlocking the clips and eventually it will release itself. You will find that once the first couple of clips are released the rest come away quite easily. You don’t have to use a wooden skewer for this.
If you have a metal rod (or the inside of a BIC type pen) this will work too.
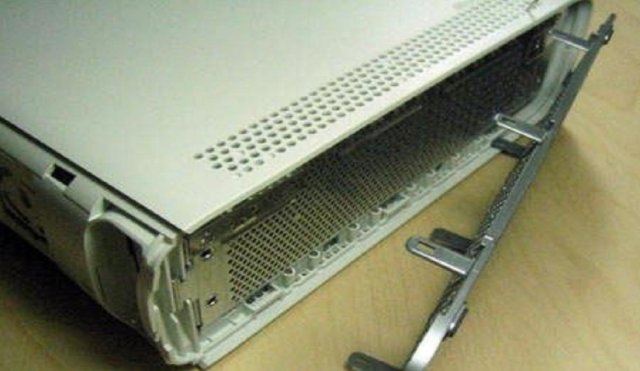
Removal of the left side piece is identical to the first except you need to remove the hard drive (if you have one) before it will release. Also, one of the holes . where you’re going to put the skewer is covered by the Xbox’s rubber foot.
Remove the foot to reveal a hole so you can release the clasp holding the side piece to the unit. Once both side pieces are removed, we can open the white body of the case as follows :
1. There are 6 retention slots on the rear of the unit and 4 clips on the front of the unit
2. Unlatch the four front clips first using the terminal driver.
3. Once all 4 are undone, gently lift up the front of the case about an inch
4. Locate the six slots on the rear of the unit
5. Using the terminal driver, push gently but firmly inwards on each slot in turn
6. If done successful y, you will hear a click each time.
7. Once all 6 are unclicked, we can lever up the rear of the case and remove this half completely.
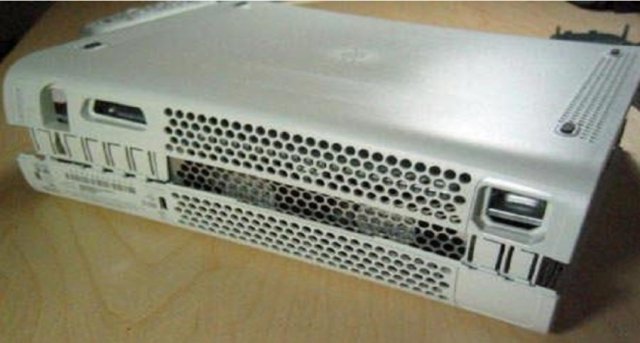
8. Flip the unit over and you will see 14 silver screws and 8 blac screws Remove these using the T10 Torx drive and the T8 Torx drive respectively.
9. Once all the screws are removed, turn the Xbox over and you can lift off the top part of the case.
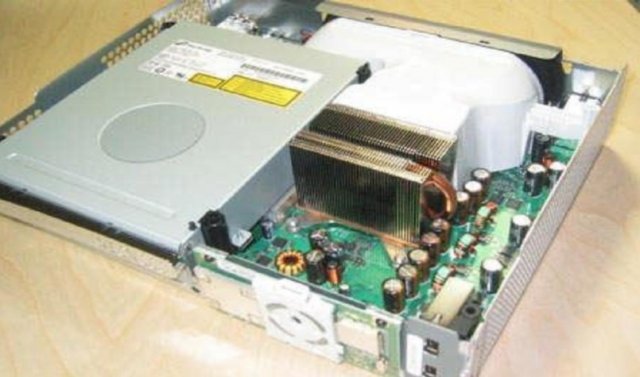
10. To remove the DVD drive, simply lift upwards. Disconnect the power cable and the Sata cable from the drive (or the motherboard – doesn’t matter)
11. The white fan shroud which leads to the GPU and CPU can be removed again by lifting upwards. There is a retention hook at the rear but this should just pop out when you lift the shroud.
12. At the front of the unit you will see a daughter PCB where the power button would normally be. Unclip the white bezel and using the T8 Torx screwdriver, remove the three retaining screws.
13. Unplug the daughter PCB We can now remove the motherboard from the case. It should just lift right out. At this stage take extra care as the mother board is very delicate.
Removing and preparing the heat sinks
The fixing method used by Microsoft leaves a little to be desired, mainly because of the undue pressure it puts right beneath a small centre point on each processor. We’re going to reaffix the heat sinks using a more ‘traditional’ method that will give more uniform support. First we’ve got to get the X-Clamps off.
1. On the underside of the motherboard PCB you will see two silver x-shaped clamps. Using the terminal driver, pry off each corner of the clamp.
2. It’s somewhat easier here to do two corners along the same side first. That way we can just wiggle the other two fixing points loose.
3. Once both clamps are removed, flip the board over and you’ll be able to gently lift up and remove the two heat sinks. The low-profile aluminium one is the GPU heat sink.
4. Using a suitable spanner or pair of pliers, remove the four fixing bolts from each of the heat sinks. We don’t need these anymore, but if you ever intend to put your unit back to how it started, hang on to them.
5. We need to clean any residue of thermal compound from both the underside of the heat sinks and the top of both processors. Firstly, get rid of any excess using a plastic scraper (you should have one that came with your thermal compound). Be careful when cleaning the processors!
6. Once the excess is gone, use Isopropyl alcohol with a lint free cloth to bring the underside of each heat sink up to scratch. There should be no evidence of ever having thermal compound on them.
7. On the processors, again use Isopropyl alcohol to remove the residue. Only a little is needed and with a little bit of effort you can get the tops of them to a mirror finish. We want them as clean as possible.
8. Apply a little thermal compound to either the top of the processor or underside of the heat sinks in accordance with the manufacturer’s instructions.
9. Re-fix the heat sinks in accordance with the diagram below.
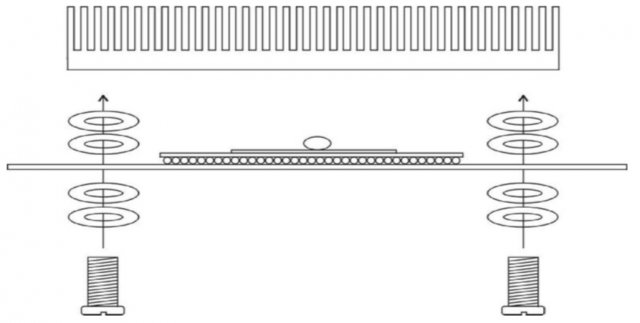
10. When tightening the screws, do top left, then bottom right, then top right followed by bottom left. At this stage do not over tighten the screws. Just use a finger and thumb on the screwdriver and stop when you can’t easily turn it further.
11. Once all four screws on each heat sink are done up as per step 9, tighten each screw one more quarter turn.
Check point 1
At this stage, reassemble everything back into the case but don’t screw anything down.Reattach the RF daughterboard to the front of the motherboard and plug in the video and power cables. Press the power button....
You will almost certainly NOT get 3 red lights now as we have fixed the compromised joints on the processors. If you get al green, you’re good to go and reassemble everything back into the housing. Make sure all screws are done up tight (you don’t need the 8 small black Torx screws that used to hold the heat sinks now) and don’t forget to clip the Ring of Light cover plastic back in place.
Check point 2
Once everything’s back together fire the console up again to check you’ve still got all green and away you go.
Other tips and trick
If at any of the two stages above, you didn’t get green lights, there are a few other things you can try before sending the console off to us. We are not responsible for any further damage done to the console with any of these methods, including the main fix.
1. When reaffixing the heat sinks, only use one washer on the underside of the motherboard. This forces the clamps down harder onto the processors. This can also be achieved by using a shim or similar between the heat sink and processor.
2. Double-check that your heat sink screws are tight. Don’t be afraid to tighten them up with quite some force, but don’t break the processors either. If you follow the tightening tips earlier in this document they should be tight enough however.
3. Just before check point 1, before the heat sink screws are fully tightened, you can attempt to ‘reflow’ the GBAs under the processors by running the console without the fans attached (and without the cover attached too) - Turn the console on and you will get three red lights. After a few seconds the processors will begin to overheat because of the complete lack of cooling and the 3 red lights will become 2 red lights (overheating). Leave it in this state for 60 seconds then turn the console off and tighten the fixing screws on the heat sinks.


