Overclocking the Dreamcast

This is all information i got from other sites when looking up how to do this..
Beware, Not all DC’s are compatible
There are three types of mainboard and internal revisions: 0, 1 and 2.
0 and 1 seem to overclock with great results, these are the ones that can read CD-R disks, such as homebrew and emulation software. Revision 2 boards not only are incapable of reading CD-Rs, but they will not overclock well. I Overclocked all models to 240 MHz and this was the result:
Revision 0 and 1: BIOS Passed, runs great!
Revision 2: BIOS CHeck failed, boots to white screen only.
There is an easy way to tell what type of DC you have. On the bottom of the console, you should see (on the bottom right corner of the sticker) a circle with a number in it, followed by a rectangle with “PAL” or “NTSC”.

You muct have revision number 0, or 1 to continue with this mod. Those with Revision 2 DC’s, you may want to try a lower clock than 240 MHz. Method:
The Hitachi SH4 (Super-Hitachi 4) speed is set by the product of the clock speed and the multiplier. Much like any modern CPU does. The SH4 is given the clock speed from an outside source and multiplies it by 6 internally. The original speed fed to the CPU is 33.3333 MHz this results in an overall speed of 199.998 MHz. In theory, whatever clock speed is fed to the CPU, it will multiply by 6 and the resulting number will be the clock speed.
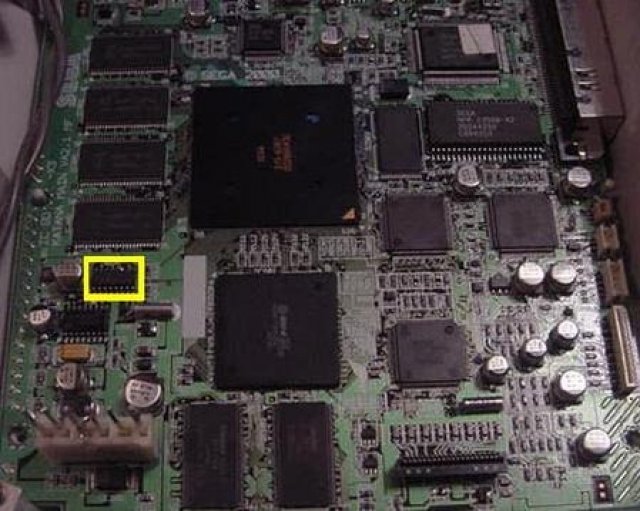
Below, we have a picture of the DC’s logic board. Highlighted in yellow is the PLL, or clock generating chip. This chip is usually called “IC305″, but it may be different on other models.
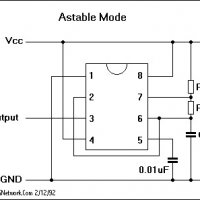
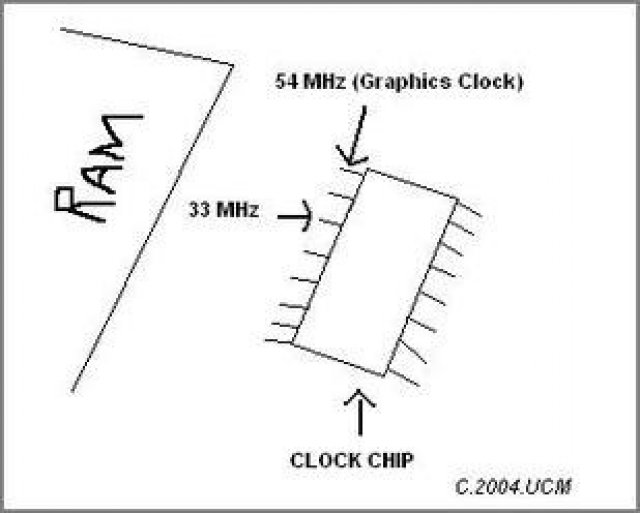
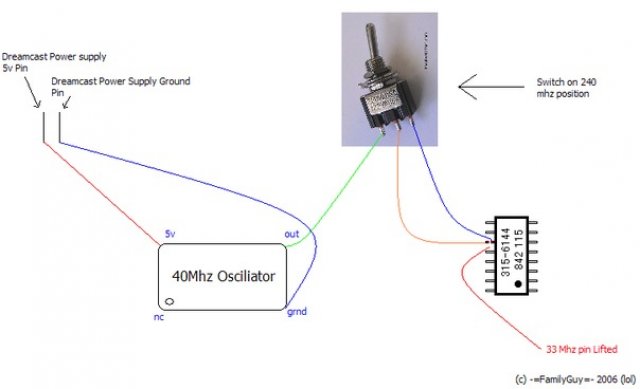
Now that the clock chip has been located, look at the diagram below. There are two pins that generate clocks for the CPU and Graphics. The clock pin with the 33 MHz output is what we will be dealing with. It *IS* possible to overclock the Graphics chip, but only when outputting to a VGA or suitable RBG monitor, due to the increasing refresh rate.
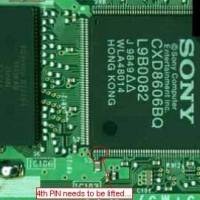
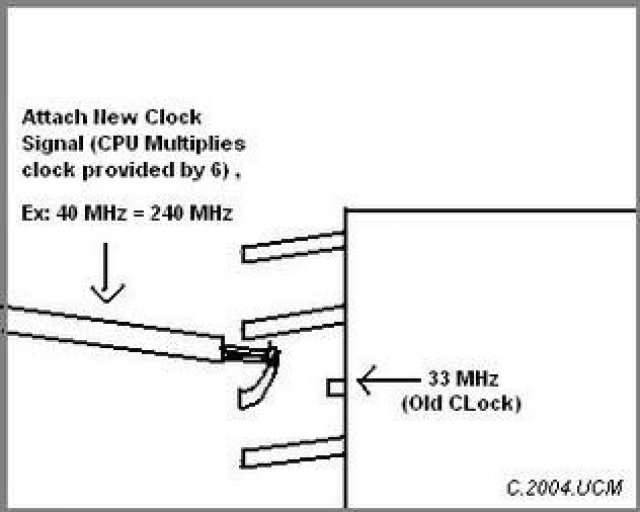
What you are going to want to do, is detach the pin from the clock chip. I used an X-acto knife. Be careful! As this pin is EASY to detach from the board, which renders the DC useless!
Once your pin is raised, run your new clock to the pin and solder, making sure that it is firmly in place. If the clock wire is not mounted or glued, it could move when re-assembling, which could cause the pin to break.
Assemble and test
At 240 MHz, I noticed a considerable difference in speed! My DivX movies played more smoothly, my original DC games that once lagged are playing at a full framerate. For those who use DreamSNES for Super Nintendo emulation: Yes, it still lags, but not as bad.
As for the heat, 240 MHz is as high as I am willing to go without constructing a new cooling system. It does get pretty warm, but the original cooling does the job just fine. If you plan on going faster, then prepare to design a new cooling system. The DC is tightly packed, and trying to cool it efficiently will be a challenge. Good Luck!
Here is another picture to show you what i mean..
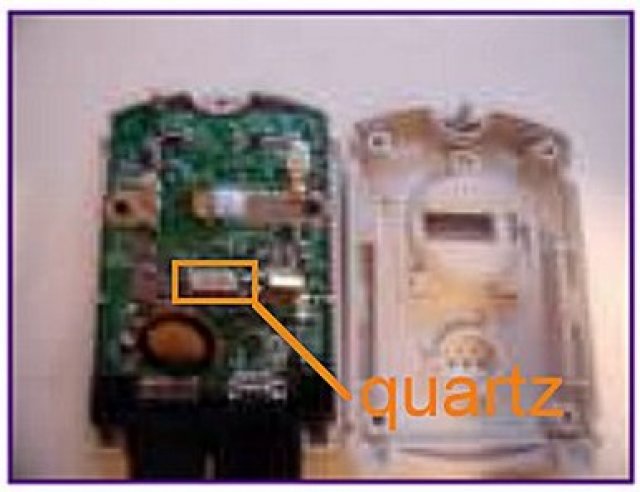
When you overclock your DC ... the VMU doesn't work properly You Can't Save!!! But !! there's a trick to get them to work well You need to overclock your vmu by the same ration than the DC So for a DC OC'ed at 240 Mhz (20%) you'll need to OC the VMU from 6 MHz to 7.2Mhz (20%) You cam use aproximative Xtal rate if you can't find the exact parts ( ex: 7.372Mhz will work instead of 7.2Mhz) Just remove the Xtal in the middle on the vmu board (batery-side) it's 3 pin Xtal the middle Pin is not important Then replace it by a Xtal of the right frequency. 2 Pin Xtal works fine Here's a pic of the Xtal to remove:
Here's a pic of a OC'ed VMU:
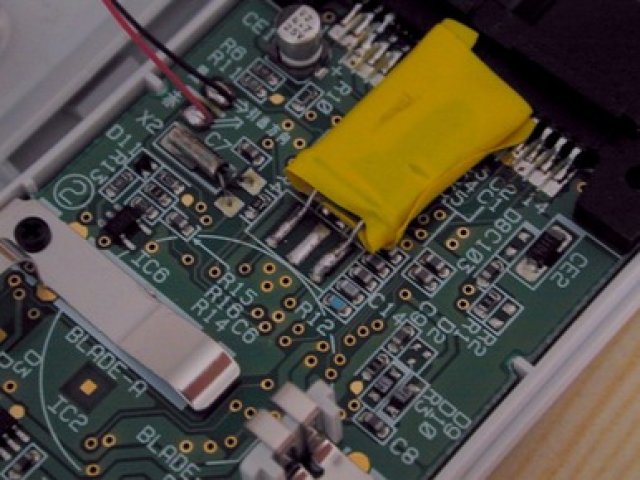
With this done you should now be able to save..


