Overclock the Dreamcast

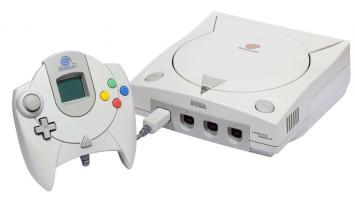
The Dreamcast is one of the best consoles ever when it comes to homebrew emulators and applications. However with some of the more demanding projects like an SNES emulator or DivX player, the Dreamcast could use a little more horsepower to make it a more enjoyable experience.
In order to give this needed boost, owners of certain Dreamcast models have the option of overclocking their little white boxes.
As usual, perform this mod at your own risk, but some people might find it worthwhile.
Since the original link has disappeared, I found a cached copy and I’ll include it below
Robert Ivy – 20th December 2004 (Editted by Prophet][)
Prophet][ stresses that this should not be attempted unless you know what you are doing. Knowledge in CPU workings and general electronics is a must.
I’m sure all of you overclockers out there have heard of this, overclocking the Dreamcast. And when doing research, you come up with this site, right?
Well my english speaking brethren, I have decided to shed some light on this mod and tell you HOW to do it, and what to expect when it’s finished. All overclocking credit goes to the author of that Japanese site! Major props m’man!! The rest of this information is Copyright 2004 UCM.
Beware, Not all DC’s are compatible
There are three types of mainboard and internal revisions: 0, 1 and 2.
0 and 1seem to overclock with great results, these are the ones that can read CD-R disks, such as homebrew and emulation software. Revision 2 boards not only are incapable of reading CD-Rs, but they will not overclock well. I Overclocked all models to 240 MHz and this was the result:
Revision 0 and 1: BIOS Passed, runs great!
Revision 2: BIOS CHeck failed, boots to white screen only.
There is an easy way to tell what type of DC you have. On the bottom of the console, you should see (on the bottom right corner of the sticker) a circle with a number in it, followed by a rectangle with “PAL” or “NTSC”.

You muct have revision number 0, or 1 to continue with this mod. Those with Revision 2 DC’s, you may want to try a lower clock than 240 MHz.
Method:
The Hitachi SH4 (Super-Hitachi 4) speed is set by the product of the clock speed and the multiplier. Much like any modern CPU does. The SH4 is given the clock speed from an outside source and multiplies it by 6 internally. The original speed fed to the CPU is 33.3333 MHz this results in an overall speed of 199.998 MHz. In theory, whatever clock speed is fed to the CPU, it will multiply by 6 and the resulting number will be the clock speed.
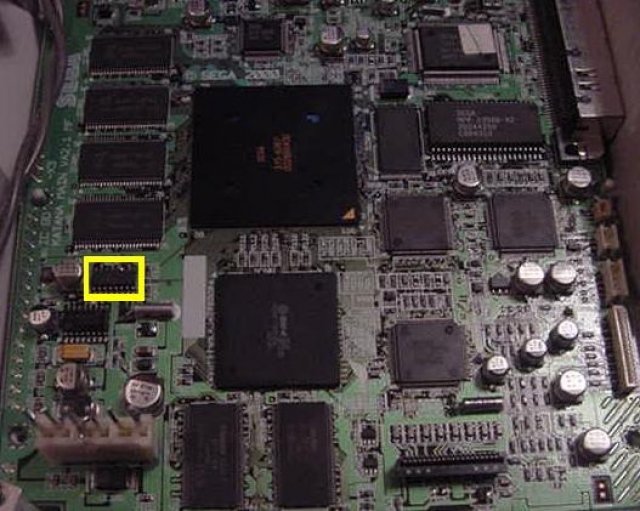
Down, we have a picture of the DC’s logic board. Highlighted in yellow is the PLL, or clock generating chip. This chip is usually called “IC305”, but it may be different on other models.
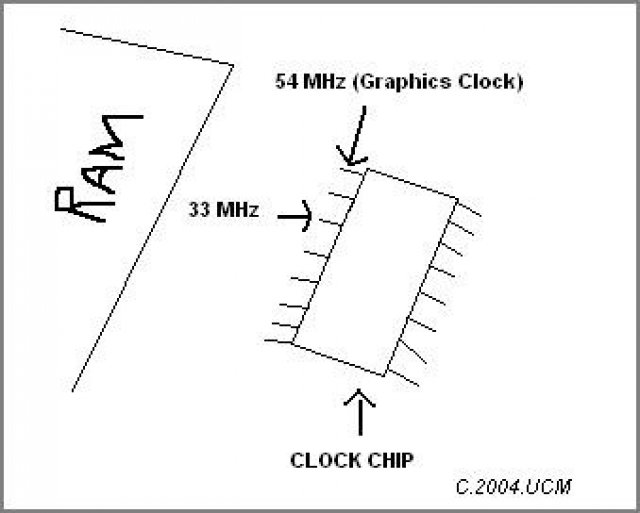
Now that the clock chip has been located, look at the diagram to the right. There are two pins that generate clocks for the CPU and Graphics. The clock pin with the 33 MHz output is what we will be dealing with. It *IS* possible to overclock the Graphics chip, but only when outputting to a VGA or suitable RBG monitor, due to the increasing refresh rate.
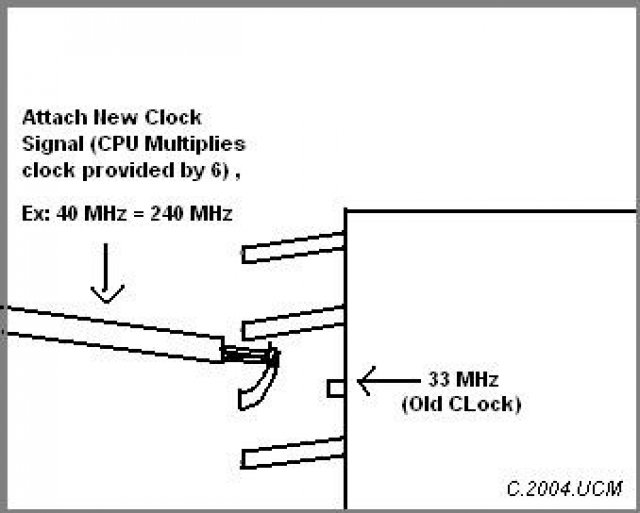
What you are going to want to do, is detach the pin from the clock chip. I used an X-acto knife. Be careful! As this pin is EASY to detach from the board, which renders the DC useless!
Once your pin is raised, run your new clock to the pin and solder, making sure that it is firmly in place. If the clock wire is not mounted or glued, it could move when re-assembling, which could cause the pin to break.
Assemble and test
At 240 MHz, I noticed a considerable difference in speed! My DivX movies played more smoothly, my original DC games that once lagged are playing at a full framerate. For those who use DreamSNES for Super Nintendo emulation: Yes, it still lags, but not as bad.
As for the heat, 240 MHz is as high as I am willing to go without constructing a new cooling system. It does get pretty warm, but the original cooling does the job just fine. If you plan on going faster, then prepare to design a new cooling system. The DC is tightly packed, and trying to cool it efficiently will be a challenge. Good Luck!


