Dreamcast-PC server guide for Windows XP/Vista/7 and Linux - part 1

Introduction
There have been several guides on setting up pc-dc server, much of which this guide is based on. The difference here is that we aim to provide a setup process the OS that most of our users are running, and in such a way that the less tech savvy can understand. While this process is by no means elegant, is the best option for those who are not willing to pay for a Dialup ISP, or for the rare and expensive BBA.
The ideal setup for a pc-dc server, is a Linux box with a serial modem. Serial modems always work, and Linux is very easy to tinker with which is important when doing something as irregular as a pc-dc server. Of course, few people run Linux on their machine, and fewer even have a serial port on their machines let alone own a bulky serial modem.
Thanks to VMware, we can emulate this ideal environment, right on your Windows machine (XP, Vista, 7) and with a simple pci or usb modem. VMware will install Linux to a virtual machine that will then detect any kind of modem as a serial device. Thus, providing us with the most reliable environment to get some online Dreamcast action. Of course, you could skip the virtual machine and do this all natively in Linux if you wish. So long as you have a Linux supported modem.
and just to be safe…. WE ARE NOT RESPONSIBLE FOR ANY DAMAGE TO YOUR PC, MODEM, DREAMCAST, SELF, CAT, RAmar, and so on!!!!!
Let’s get started then shall we?
Content
- What you’ll need…
- Step 1: Windows Setup
- Step 2: VMWARE Setup
- Step 3: Linux Setup
- Step 4: Dreamcast Setup
- Step 5: Running your PC-DC Server
- Step 6: (OPTIONAL) Building a Line Voltage Inducer
- Phantasy Star Online
- Conclusion
- Credits
What you’ll need…
- A PC with Windows XP/Vista/7
- An ISO of Crunchbang Linux
- DSL or Cable internet connection through a router
- Dreamcast with Browser (ie. planet web)
- usb modem v9.2 with voice (highly suggest zoom 3095)
- VMWare
- Line voltage inducer (maybe!)
Step 1: Windows Setup
Plug in your modem and install whatever drivers are needed for it. This should be straight forward.
Once installed, Windows will assign the device to a COM port. We need to know which one this is so…
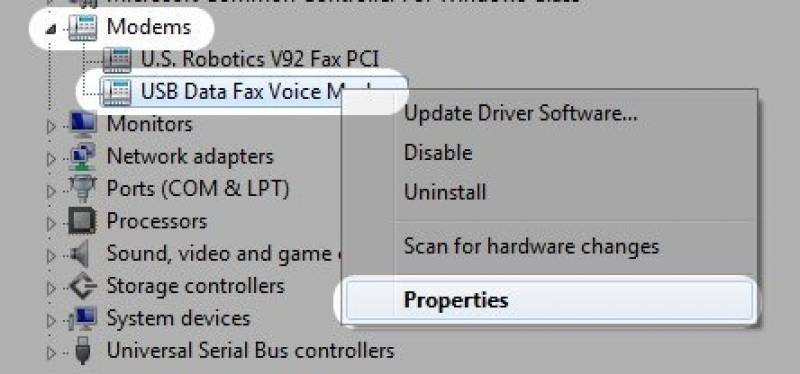
Right click on My Computer-> Properties -> Device Manager -> Modems
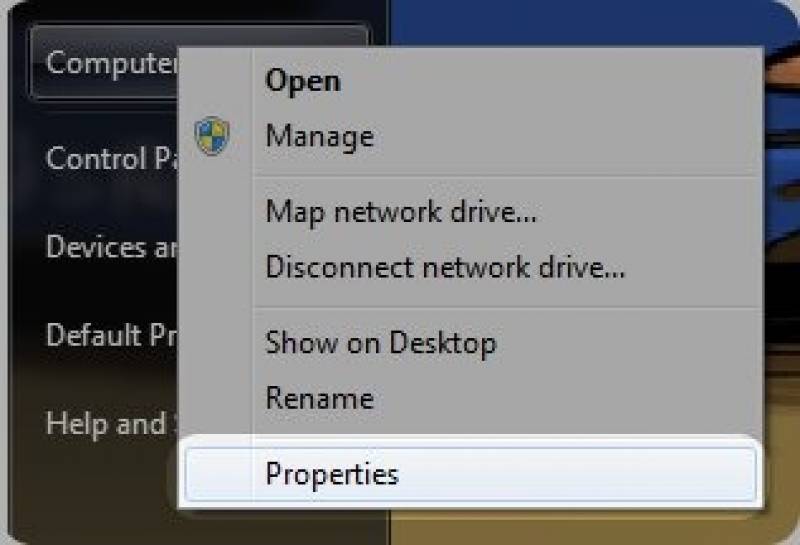


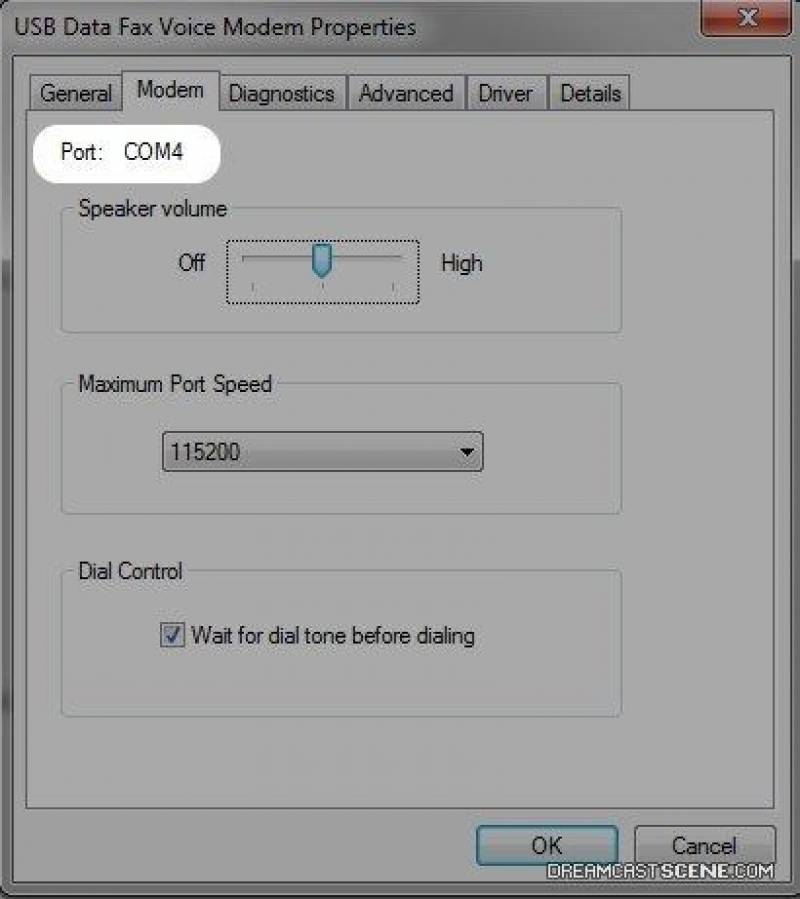
Right click your modem -> Properties -> Modem tab -> Find your Com port!


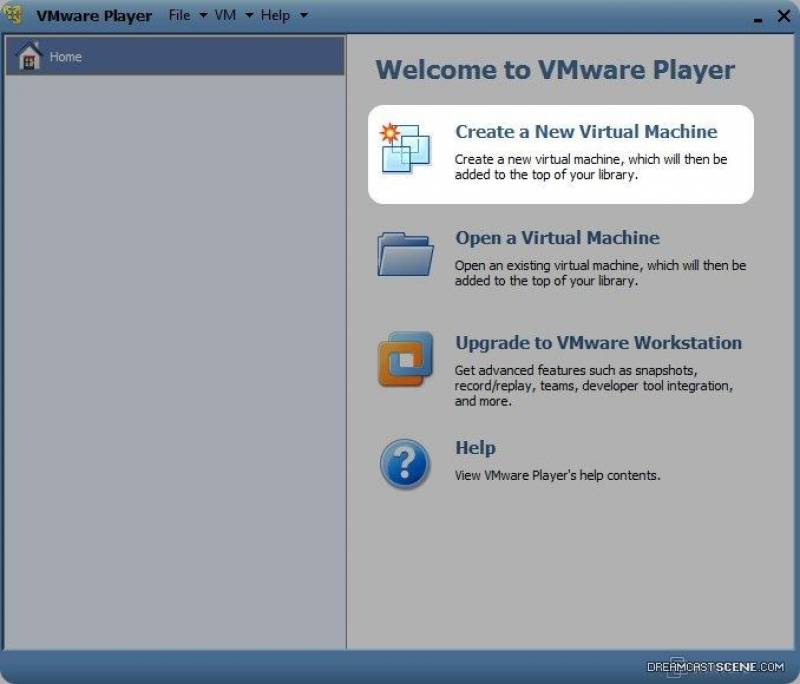
Step 2: VMWARE Setup
Next we’ll install VMWARE, this handy app will let us install any operating system onto a “virtual machine” while you’re running Windows.
you can find it here https:///www.vmware.com/tryvmware/?p=player&lp=1
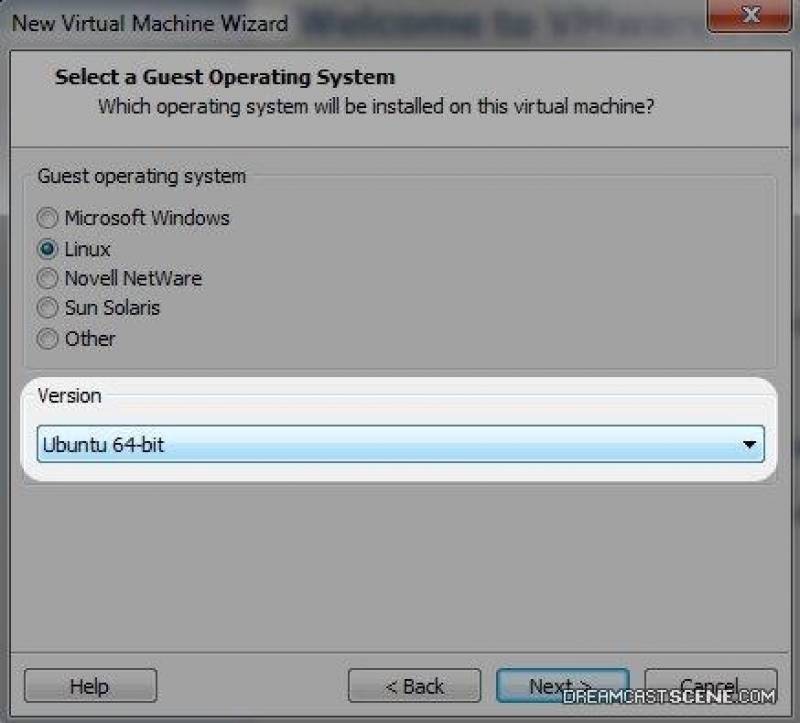
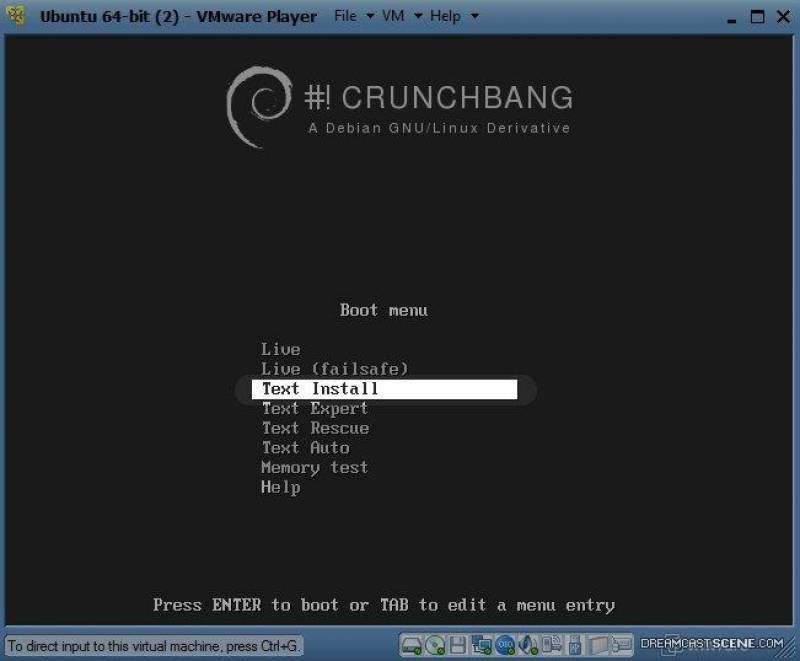
The OS we are going to install is called CrunchBang Linux. It’s a debian based distro using an incredibly lightweight desktop environment which will use less ram. Those of you using netbooks with a native install of crunchbang will especially appreciate this OS. http://crunchbangLinux.org
This guide was tested with both Crunchbang 9 and 10.
Now in VMware, add a virtual machine, and select the ISO of crunchbang that you downloaded.
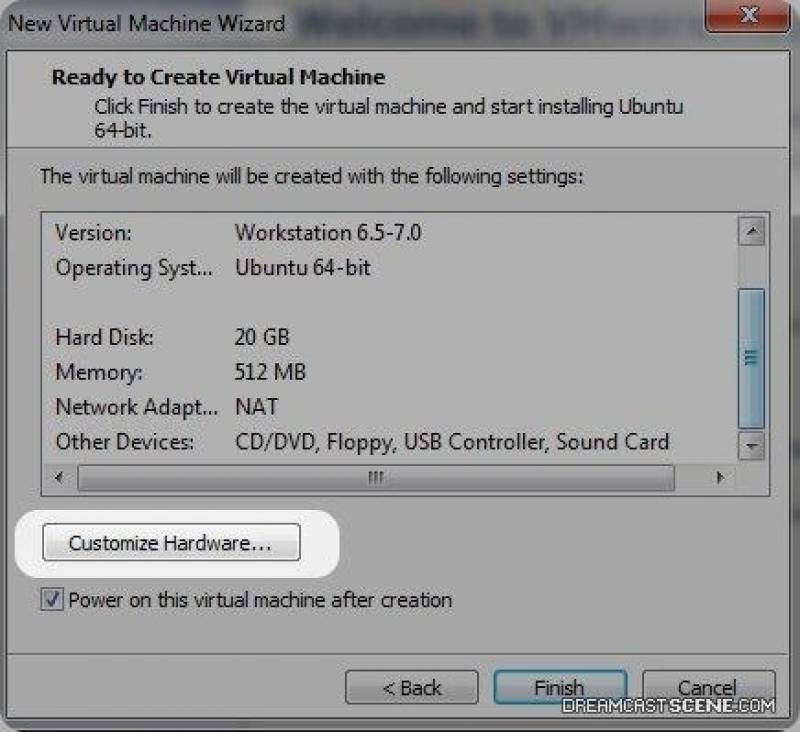
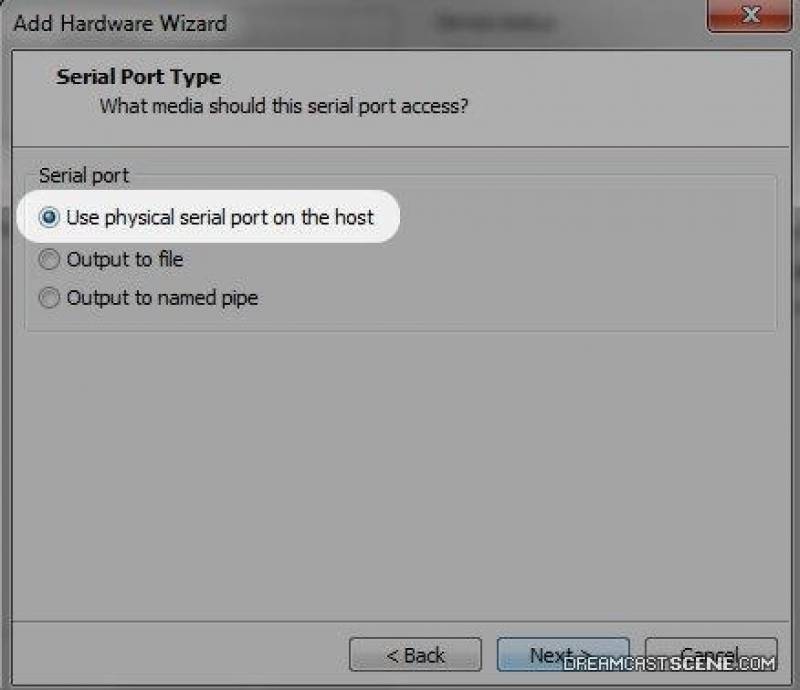
Before installed the OS, we need give the virtual machine access to our installed modem.
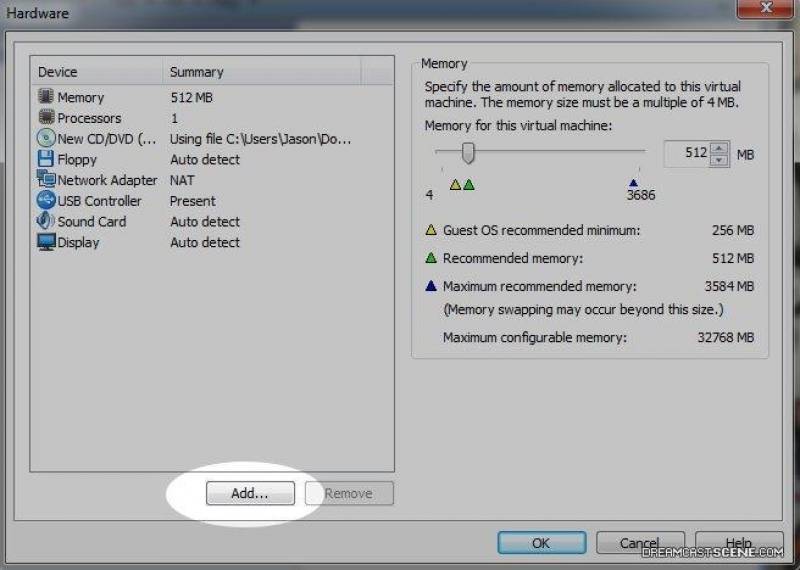
Customize Hardware -> Add -> Serial Port
Use Physical serial port -> select our Com port
See that Connect at power on is enabled under Device Status
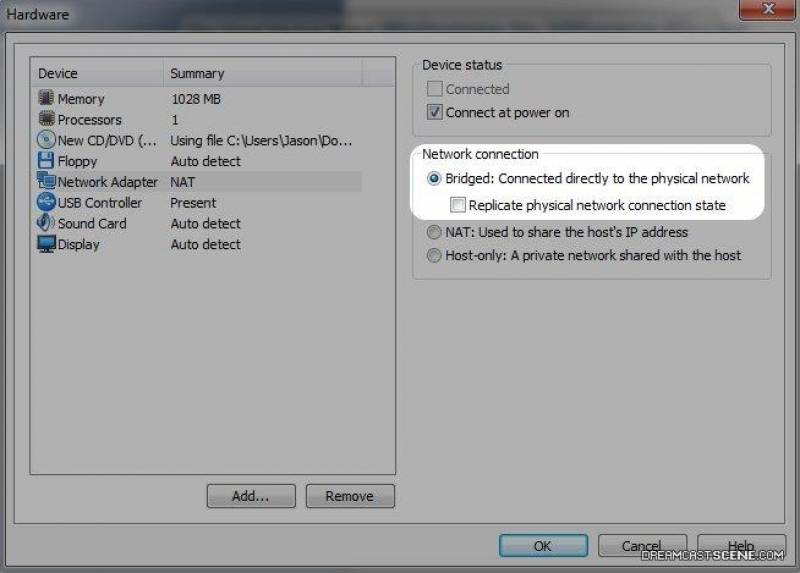
Next click on Network adapter, and change it to “Bridged” and see that Replicate physical network connection is DISABLED.
All set, let’s install Crunchbang. This is pretty straightforward. If you have any problems here I suggest searching through their forums.


Step 3: Linux Setup
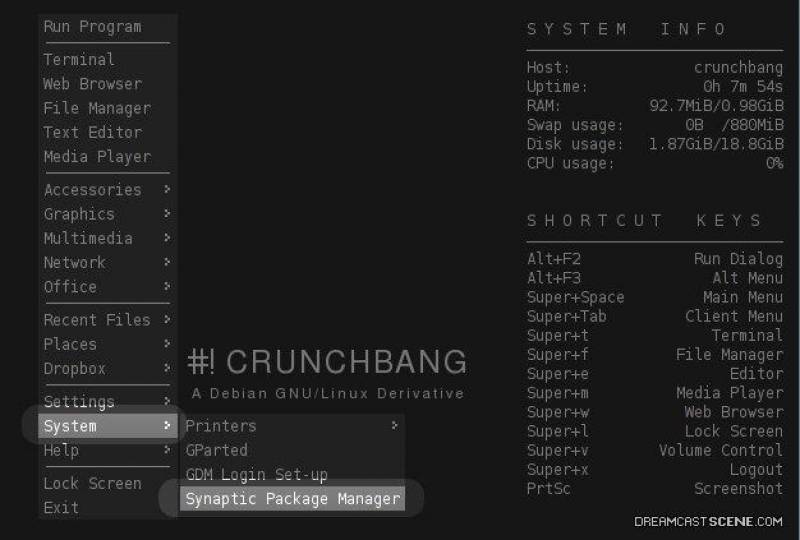
Once installed, hit Super+Spacebar (super = Windows key)
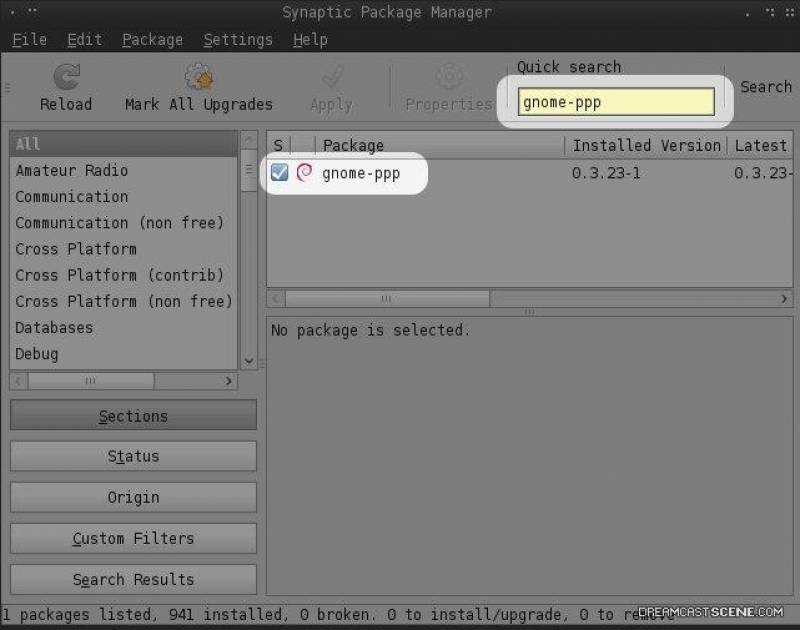
System -> Synaptic Package Manager -> enter your password
We will be installing mgetty, ppp, and gnome-ppp
You might have to hit reload and update repositories if they aren’t showing up
now hit Super+t and type
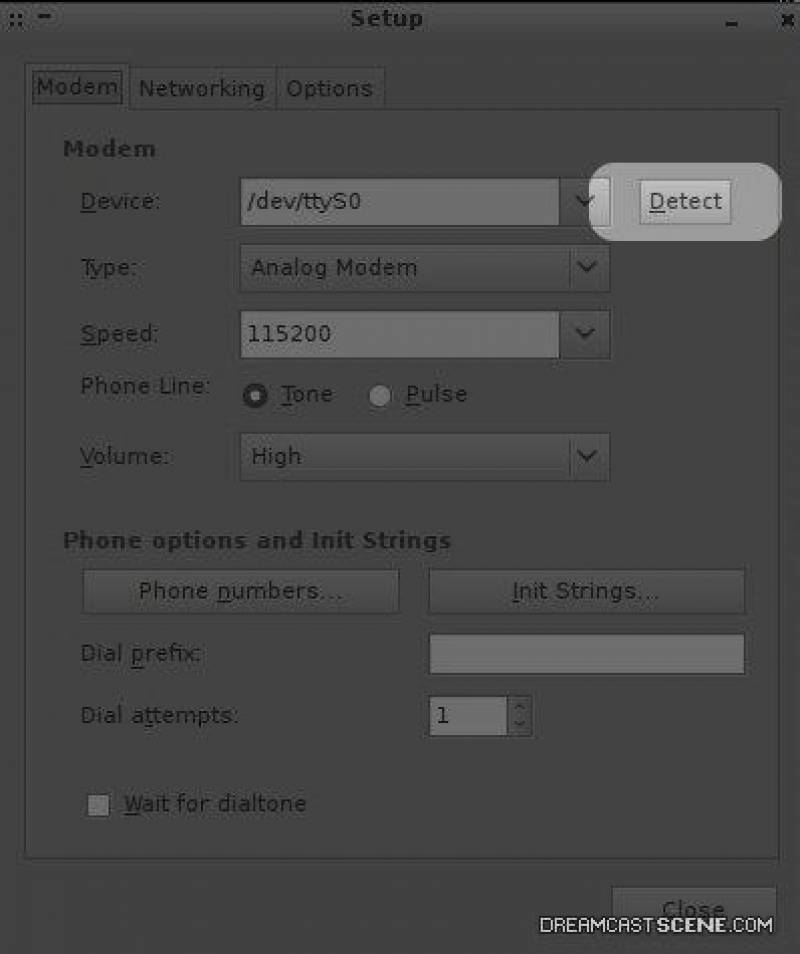
sudo gnome-ppp
enter password.
hit setup -> Detect
this will tell us where the modem is in Linux. /dev/ttyS0 or something like that.
Back in our terminal (super+t), type
sudo gedit /etc/ppp/options
delete everything there and paste in the following
debug
login
default-asyncmap
require-pap
proxyarp
ktune
#IP Addresses. Uncomment whichever one you wish to use
#router IP for internet browsing
ms-dns 192.168.1.1
#sylverant PSO server
#ms-dns 67.222.144.120
The ms-dns line is the ip address of wherever you’d like to connect to. The IP address of your router will be used to browse the internet with planetweb or dreamkey, but for pso you will have to enter the IP of the ship you wish to connect to.
Now open a new page in gedit. And type in the local IP address of your computer, and then the IP address you wish to assign your Dreamcast. Then your netmask. The format will look like this.
192.168.1.101:192.168.1.105
netmask 255.255.255.0
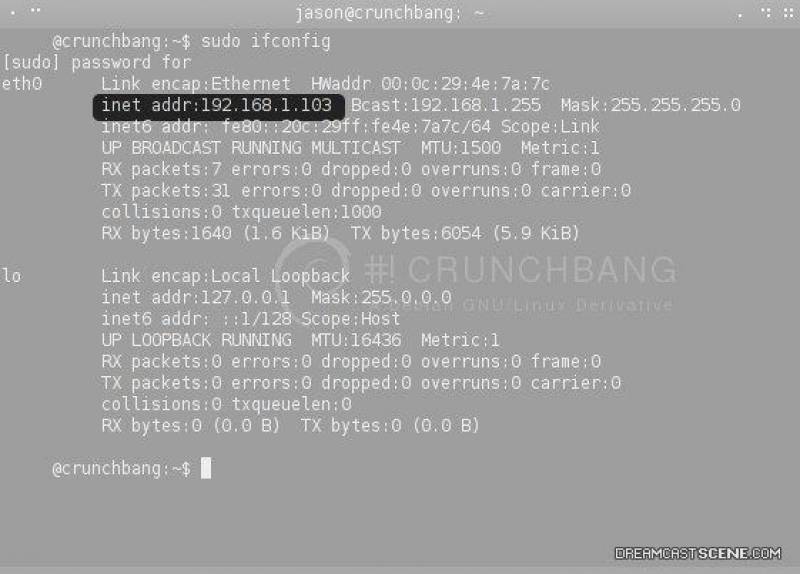
To find out your local IP, go back to the terminal and type
sudo ifconfig
It will probably be similar to the one posted. Paste in it, and choose the address you want for the DC. It can be any IP from your router’s IP Pool that isn’t being used.
So if your vmware local IP is 192.168.1.101, then you can assign 192.168.1.102 to your Dreamcast so long as there isn’t another device using that local IP.
Your netmask will be probably be the same but check in ifconfig to be sure.
Now, we are going to save this file as /etc/ppp/options.ttyS0
Replace ttyS0 with whatever the location of your modem is.
next open /etc/ppp/pap-secrets
add the following line at the bottom
dream * dreamcast *
now back in terminal, paste the following..
sudo useradd -G dialout,dip,users -c "Dreamcast user" -d /home/dream -g users -s /usr/sbin/pppd dream
and
sudo passwd dream
when prompted, enter dreamcast
This will create a user that has access to the modem, the Dreamcast will connect to the pc as this user
Now in gedit, open up etc/mgetty/mgetty.config
and paste the following. Replace ttyS0 with location of your modem if it’s different.
debug 4
fax-id
speed 115200
port ttyS0
data-only y
issue-file /etc/issue.megetty