Sega Dreamcast Burning FAQ
ver. 2001.04.10

1. Introduction and Brief History of the DC Scene
The Sega Dreamcast was released in the USA on 09Sep99, the Utopia Boot CD was created by Wildlight of Utopia and was released on 22Jun00. It ushered in the age of Dreamcast piracy, with Utopia releasing Dead or Alive 2 and Soul Calibur in the next two days, then Kalisto released Evolution on the 26th and continued to flood the DC scene with games, mastering the art of the self boot and DiscJuggler with their release of Dynamite Cop on 19Aug00, until 2 Sept 00, when they called it quits, claiming Sega had offered them stock options to stop releasing DC games (note that their other console groups like the PSX remained and remain in the full swing.) Only 2 days afterwards, Echelon released Flag to Flag CART Racing, and quickly filled in the gap left by Kalisto, releasing most of the major games in the scene and going forth with new tools like the Echelon Selfboot Kit. Kalisto came out of hiding on 09Nov00 to release the highly anticipated 4-CD Shenmue. NBC, Accession, Eurasia, CCS, MiniMe, Stone Arts, Hooligans, Infinity, Lightforce, Aphex, Paradox, R18, to name a few, have all provided many quality US and import releases where Echelon may not have had access to the games or interest in releasing them.
The scene was wild and rampant until December when Kalisto and Echelon were expected to release at least one game daily. In January, new releases started coming few and far between, since most of the games that could have been ripped had already been ripped. In mid-February 2001, Sega announced the end of Dreamcast unit production would take place on 31Mar01 citing the loss of hundreds of millions of dollars, and many third party companies scrapped their DC games in development even if they were near completion for more viable platforms, such as the Playstation 2, Nintendo GameCube and Microsoft X-Box. In late March, Sega announced that they were planning on developing Sega games for other platforms, namely the Microsoft X-Box which was a no-brainer since the Dreamcast's inclusion of MS' WinCE. 31Mar01 came with a whimper, and the Dreamcast scene continues slowing as the number of slated games decreases...
1.1. General Questions
First of all, there is no modchip required to play backup Dreamcast games. The current modchip allows play of imports exclusively, but has no special code for CDRs. All games are playable without any hardware modification. Some of the earlier releases require a bootdisc (the Utopia Boot CD), but most games are fully self-bootable. Sega has manufactured newer Dreamcasts that will NOT boot the majority of releases and the Boot CD, but there IS a workaround. See this section for more information.
Most releases come in ".CDI" format, which is a Padus DiscJuggler image file. Make sure you get a copy of DiscJuggler from www.padus.com. A crack for the evaluation version can be found. Try http://astalavista.box.sk and search there.
Some releases are in BIN/CUE format, which is burnable with CDRWIN at www.goldenhawk.com. Download it and crack it. These releases are not self-bootable and will require a boot disc. You can find the Utopia bootdisc if you look hard enough.
Once you get the files of a release (usually files .001-.0XX with an NFO and SFV file), you will need WinRAR to unpack them (nobody uses ZIP for warez releases). Get WinRAR at www.rarsoft.com.
YOU CAN NOT COPY THE GAMES FROM THE ORIGINAL DISC. It's not the same as PSX - you can't rent a DC game and do a CD to CD copy. It simply doesn't work. You HAVE to download the images.
Get a copy of SmartFTP at www.smartftp.com for browsing your newfound FTP sites. Get Polaris IRC or mIRC from www.mirc.com and use irc.relic.net as your server. There are many channels there with plenty of Dreamcast games. You will have to teach yourself how to use this software.
2. Getting Started
2.1. The Utopia Boot CD
Starting with finding, downloading and burning the Utopia Boot CD should give you a good idea of the regular routine necessary in burning DC games. Need: location, burning instructions.
2.2. Finding Games
DC Games can be found in many places:
- Websites
- Virtual Drive Websites (I-Drive, FreeDrive, etc.)
- Public/Private FTP sites
- IRC FServes/DCCs
- Filesharing programs (Napster/Aimster/Gnutella/Swapoo,etc.)
Do NOT hassle the release groups, whether through e-mail or irc, for places to download games. Check around on Dreamcast sites such as Dream On: Dreamcast Portal for places to download games. FTP sites and Website links can sometimes be found on Dreamcast messageboards. Some of the bigger forums and messageboards (like isonews and dcwarez) have 'No Requesting' policies: do not ask where you can get or find the games from. Make sure you READ the help files and FAQs for the particular messageboard BEFORE posting! READ other newbie posts to see why others get flamed and USE COMMON SENSE!
2.3. Downloading/Unpacking
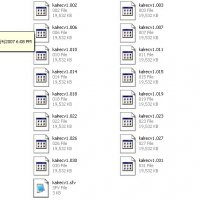
Original releases by the major groups will almost always be in RAR format, chunked into 20MB files, and be named "e-dayusa.001", "e-dayusa.002", and so on. If it's not in RAR format, more than likely it's either repacked by someone else or it's been ripped my a smaller/minor group. Starting RAR file extensions can also be .RAR, .R00, or .R01, but the first file will almost ALWAYS be .001 or .RAR.
Get WinRAR to open RAR files.
ACE files are used by some minor groups or personally repacked games. ACE files are WinACE compressed files, and their file extensions in succession are .ACE, .C00, .C01, and so on. WinACE compressed files will NEVER have .C00 or .C01 as their starting files.
Get WinAce to open ACE files.
NFO files included with the games are the groups' text files and release information. These files are readable with Notepad or any other plain text editor, and give useful notes and information on the game's release. NFO files are not necessary to burn the games, but sometimes contain crucial instructions needed to burn the game. Many NFO files for released games are available from http://www.isonews.com/.
SFV files are also usually included with the games... these files are plaintext files with CRC error checking information. They're used to determine if archive files have been corrupted, or if there are files missing. Without the SFV files, the only way to see if the game archive is good is to unarchive it. If no error messages are returned, the archive is fine. SFVs are not necessary to burn the games.
Get WinSFV32 to open SFV files.
ZIP files are sometimes included with the release, these usually contain scans of the CD covers, the CD itself, game manuals, or other supplemental game information.
Get WinZip to open ZIP files.
2.4. Burning Preparation and File Formats
After you unpack the files, you will probably have one of the following formats:
.CDI (may contain UNPACK.EXE/INJECT.EXE) (Padus Discjuggler 2/3 image)
CDI's are exclusive to DiscJuggler and are the defacto standard for Dreamcast games. CDI's, as a rule, are almost always selfbooting games, meaning that no Dreamcast Boot CD is necessary to play the game. DiscJuggler was the first program discovered that could easily backup the DC game's specialized CD layout information, and thus making the copied games able to selfboot. Nero can also burn selfbooting games from an image, but DiscJuggler was favored by the ripping community and became the standard.
.CUE/.BIN with UNPACK.EXE (GoldenHawk CDRWin/generic image)
CUE/BIN packed games are a generic format and require a Boot CD to play. CUE/BINs and the programs that support them lack the ability to duplicate the special cd layout needed to make a game selfbooting. CUE/BINs, however, are more versatile in that you can burn them with many different programs (CDRWin, Fireburner) and also able to unarchive them to view/hack/patch the files within the game. The CUE file is plaintext and can be viewed with Notepad or any other text editor, and contains the layout information for the BIN binary image.
Sometimes when CUE files are loaded, the burning program will error and ask the path/where to find certain files, such as game data, or mp3/wav files for audio tracks. Whoever packed or repacked the game may have screwed up and not bothered removing their personal path information out of the .CUE. You must exit out and manually edit the .CUE file with Notepad or another text editor. When you view it, you'll see that some of the entries have directory paths before the filename. Directory paths are NOT necessary in this case... delete them, leaving only the filenames, save the CUE and reopen it in the burning program.
.ISO (generic image)
ISO files are also generic formats much like CUE/BIN, and can be burnt from CDRWIN, Adaptec Easy CD Creator, Fireburner, and many other programs. While the community would probably never release a DC game in ISO format, knowing what an ISO file is is helpful when it comes to manually dummying files, patching and manually burning games.
Formats can sometimes can converted to other formats, which can be helpful if you run into problems burning a game, or need to patch a game. CDI2Nero, available from http://cdirip.cjb.net/ will convert a DiscJuggler image to a Nero image. Please note that image size does NOT matter. MANY game images are over 700MB, and can be burnt to 80min/700MB CDRs with NO problems. At the time of this writing, no game has been released that requires larger than a 80min/700MB CDR, although 90Min/800MB and larger DO exist. Images much smaller than 700MB, like 100-200MB or so and usually in CUE/BIN format are games that have NOT been dummied.
3. Burning
Please note: The DC CANNOT read CD-RW's. Don't bother trying to test burning games out on them.
3.1. Burning CDIs with Discjuggler 2/3
'Auto Insert Notification' should be switched off (unchecked) in your burner's settings:
Go To Start :: Settings :: Control Panel :: System :: Device Manager tab :: CD-ROM :: select your burner :: Settings :: uncheck The 'Auto Insert Notification'. The help file for DiscJuggler also recommends checking the following drive settings: 'Disconnect', 'Sync data transfer' And 'DMA'.
Also ensure DiscJuggler is set to take 80Min CDR's.
If the CDI came with a UNPACK.EXE and INJECT.EXE, then run the UNPACK program first to unpack the mp3/wav audio files. UNPACK should close itself when it's finished. Then run INJECT to inject the audio files into the CDI image. You may delete the mp3/wav files when INJECT is finished.
- Run DiscJuggler
- Go to 'File' and then 'New'
- Choose 'CD Image to CD Recorder'
- Now click the 'Source' button (it's the icon) and locate the .CDI file and press 'OK'
- In the 'Action' box choose 'Write'
- Click 'Start'
If you receive buffer underruns, try rebooting, lower the writing speed, or check the Buffer Underrun section for more solutions.
If you find that your burner isn't supported by DiscJuggler or it seems like you can burn but get errors, check the CDI2Nero section.
Note: Some CDI images created in DJ3 will NOT work in DJ2. After selecting the source CDI, DJ should automatically display the number of sessions (should be 2) and the image's volume label. If you get an error in the log window saying "session information could not be found, using user defined settings", do NOT burn the cd as it will NOT work.
Modifying the user settings will not help either as you cannot specify the settings for each session. Selfboot Dreamcast images usually have 2 sessions, the 1st being a Audio/Mode1 session with multiple CDDA tracks, and the 2nd being a CD-XA/Mode 2 session with one track containing the game data.
Sometimes converting to Nero using CDI2Nero will allow you to burn the image.
3.2. Burning CUE/BINs with Fireburner
If there was an UNPACK.EXE included with the CUE/BIN files, run the UNPACK to unpack the mp3/wav files needed for the CDDA.
- Run Fireburner.
- Click on Visual Cue Burner/Binchunker (should be the leftmost button.)
- In the Visual Cue/CD Track Layout, rightclick and select Load Tracks from *.CUE.
- Select the .CUE file. The tracks will load in the window.
- Rightclick on the Track Layout again, and select Burn/Test Burn.
- Uncheck Test Burn.
- Click Burn/OK.
3.3. Burning CUE/BINs with CDRWin
If there was an UNPACK.EXE included with the CUE/BIN files, run the UNPACK to unpack the mp3/wav files needed for the CDDA.
- Run CDRWin.
- This section incomplete.
3.4. Burning CUE/BINs and CDDA with Nero
Once you've used 'IsoBuster' on the .BIN and patched it if needed, if there was an UNPACK.EXE included with the CUE/BIN files, run the UNPACK to unpack the mp3/wav files needed for the CDDA.
- Run Nero 5.0
- Choose 'Mixed Mode CD'
- In the 'Multisession' Tab select 'No Multisession'
- In the 'File Options' Tab select 'ISO Level 2 (Max of 31 chars)', 'Mode 1', 'ISO 9660' And 'Joliet'. Leave the others unchecked.
- Leave the 'Volume Descripter' and 'Dates' tabs alone.
- In the 'Burn' tab select 'Write', 'Finalize CD (No further writing possible!), 'Write Speed' as you choose and 'Number of Copies' as 1. Leave the others unchecked.
- Select 'New'
- Find the folder with the files extracted using IsoBuster (if necessary), and highlight all the contents of that folder and drag them across to the top box in Nero.
- Make sure that all files including the ones in folders have their 'File Priority' set as 'High' except the dummy file which needs to be set as 'Low'. To do this, highlight the files, rightclick on them and choose 'Properties' and set the 'File Priority' as 'High'.
- Find the folder where the .WAV Files were UNPACKed, and drag them across to the bottom box in Nero, make sure there in the correct order.
- Select 'File' and then 'Write CD...' and then 'Write' again.
3.5. Patching and Burning with Nero
Patches can be found at http://www.dccopyworld.com/
Patching
- Make a folder and put the .bin, .cue, .ppf and applyppf.exe in
- Open MS-DOS Prompt
- Type 'cd\whatever' you called the folder (eg. cd\royal rumble)
- Now type 'dir' to make sure all the files you need are there
- And Type applyppf eg. applyppf kal-wwfr.bin wwfr.ppf
Burning
- Run Nero 5.0
- Choose CD-ROM (ISO)
- In the 'Multisession' tab select 'No Multisession'
- In the 'File Options' tab select 'ISO Level 2 (Max of 31 chars)', 'Mode 1', 'ISO 9660' And 'Joliet'. Leave the others unchecked.
- Leave the 'Volume Descriptor' and 'Dates' tabs alone
- In the 'Burn' tab select 'Write', 'Finalize CD (No further writing possible!), 'Write Speed' as you choose and 'Number of Copies' as 1. Leave the others unchecked.
- Select 'New'
- Find the folder with the files extracted using IsoBuster, and highlight all the contents of that folder and drag them across to the 'ISO 1' box.
- Ensure that all files including the ones in folders have their 'File Priority' set as 'High' except the dummy file which needs to be set as 'Low'. To do this, highlight the files and rightclick on them and choose 'Properties' and set the 'File Priority' as 'High'.
- Now select 'File' and then 'Write CD...' and then 'Write' again.
3.6. CDI2Nero
DiscJuggler will just not work with some burners. CDR drive manufacturers try to stick to the industry standards but sometimes leave out certain features... burners will support write methods such as Session-At-Once, Disc-At-Once, and Track-At-Once, or maybe one or two of these methods, but not the crucial ones needed for DiscJuggler. Or perhaps you're having problems with a DJ3 image and DJ3 won't work properly on your machine, but DJ2 works fine. CDI2Nero may help. CDI2Nero comes in 2 flavors, DAO (Disc-At-Once) and TAO (Track-At-Once), if one version doesn't work properly for you, try the other. Usually you'll be able to convert those pesky images over to a usable format.
1- Download CDI2Nero.
If you have an Unpack.exe and Inject.exe with the .CDI, run the Unpack.exe and then the Inject.exe, you must do this before using CDI2Nero.
Also some games need to have the small track removed from the beginning for which you need 'Trackmerge'.
2- Run CDI2Nero and a box will appear asking you to select the .CDI.
3- You'll be prompted to rename the new .NRG
4- You can double-click on the new .NRG file to open it in Nero (and skip to Step 8) or...
5- Run Nero and in 'CD-ROM (ISO)' Mode select 'No Multisession'.
6- Press 'Open' at the bottom right.
7- In the next box that appears change the filetype to 'CD-Image (*.nrg)' and select the .NRG you just created from CDI2Nero.
8- On the next screen uncheck 'Simulation', select the Write Speed you wish.
9- Press 'Write'
10- You may get a message that says something like 'Really use Disc-At-Once instead of Track-At-Once to produce a more accurate but less compatible disc?', Select 'Yes'
11- Burning will start.
3.7. Dummying games
Dummied games and dummy files refer to the practice of filling out the center of the CD with empty space so that the game data is pushed to the OUTSIDE of the CD. CD-ROM readers read the data on the OUTSIDE of a CD faster than on the inside... Non-dummied games take longer to boot, load, and sometimes have the ill effect of not being able to load the game textures fast enough during play, resulting in missing textures, slowdown, and general visual weirdness. Dummy files are also the reason a 13MB RAR'ed game (like Neo Golden Logres) can expand to be a 700MB+ CDI image.
For this you'll need:
WinRAR - http://www.rarsoft.com/
IsoBuster - http://www.dccopyworld.com/
DummyFile - http://www.dccopyworld.com/
- Put all downloaded files in a new/temp folder
- Open 'WinRar' and find your new/temp folder with the files
- Rightclick on the '.001' (or sometimes .RAR) and select 'Extract from selected archives'
- Leave these settings alone, click 'OK'. This will create a new folder inside the new/temp folder with the files. If the files are a '.BIN' and '.CUE' (You might also have a 'Unpack.exe' file, If so do steps 5, 6 & 7, and then go to the Burning with Nero section. If it's a '.CDI' (You might also get a 'Unpack.exe' and 'Inject.exe') go to Burning with Discjuggler)
- Make another new/temp folder called something like 'New Game'
- Open 'IsoBuster' and choose 'File' and then 'Open File Image' then find the folder WinRAR just made and then change the 'Files of type' option to 'CDR-Win (*.BIN)'
- Select the '.BIN' file and choose 'Open'
- Highlight the files that have just appeared and rightclick on them and choose 'Extract Files' and then choose the 'New Game' folder and press 'OK'
- Go to the 'New Game' folder and rightclick on it and choose 'Properties', this will tell you the size of the folder, to burn it it needs to be about 650MB! Usually there about 300MB so you need to make a dummy file.
- Open Dummy File
- Press on 'Pick Location', and press on the 'New Game' folder and then on 'OK'
- Choose the size of the dummy (eg. 200 = 200 MB - so if the 'New Game' folder is 350 MB, make the dummy about 295, i don't make it exactly 650MB
- Press 'Build'
- Burn with Nero.
3.8. Buffer Underrun/ASPI Problems
Need buffer underruns suggestions here - previously was just cdi2nero
ASPI probs? make sure its updated: http://www.adaptec.com/ support/faqs/aspilayer.html
4. Copying Burnt/Copied Games
Almost any CD copying program will copy Non-Selfboot games since they have no special session layout or information. Many CD copying programs will copy Selfboot games. Recommended programs in order of success:
- NTI CD Copier 3 / PSX Copy 6
- Adaptec CD Copier
- Padus DiscJuggler
Copying a Selfboot game with DiscJuggler:
- Open 'DiscJuggler'.
- Select 'New' and then choose 'CD Copy from the Same Recorder'
- Insert the game you want to copy into your burner
- In the 'Action' box choose 'Write'
- In the 'Advanced' tab choose 'Overburn' and leave the other settings as they are
- Hit 'Start'. It will create a temp image on your hard drive.
- Insert a blank CDR in the drive
- Press 'OK'
5. Playing Burnt/Copied Games
If it's a selfboot game, simply put it in the Dreamcast and power it on. If it's a non-selfboot, load the Utopia Boot CD first, wait for the reindeer to appear, eject and replace the Utopia Boot CD with your non-selfboot game, close the lid and it should load as normal.
The easiest way to determine if a game is selfboot or not, power the DC up with no game... when the DC menu appears, insert your game, close the lid. After detecting, select Play. If the game plays, it's selfboot. If the message "Please insert game disc." appears, it's non-selfboot.
IMPORTANT: If you're using a VGA box, please read the VGA section BEFORE using the Utopia Boot CD!!!
6. Other Questions
6.1. Newer Non-CDR DCs and workaround
from DJ Motion on isonews.com - thanks!
The new DCs have their BIOS programmed to prevent booting CD(R)s which have audio (audio boot data in this case) before the game data. Not nice. Especially considering nearly all previous games - including ECHELON rips - work like this. When buying a Dreamcast, look for Dreamcast units manufactured BEFORE November 2000. There have been some units manufactured in Nov. 2000 with the new BIOS revision that will not work with CDR's. Note that retail box type (regular or Smash Pack) does not matter, only the manufacture date of the unit, which should be visible through a small window on the Dreamcast retail box. Also identified as not working with CDR's are the Sakura Taisen and Hello Kitty special edition Dreamcasts available in Japan.
The solution (No modifications to console needed):
Right, so you've got your CD written and you want to make it selfboot and work on your new Dreamcast. Here goes...
- Rip the CD with DiscJuggler to a CDI file.
- Go in to a DOS/Command Prompt and using CDIRip, rip the CDI file so that a .CUE and .BIN file are created.
- You can delete the .CUE file. Download a free copy of ISOBuster from the net and extract the files to a directory from the .BIN file.
- Using IPBIN4WIN, create an IP file which corresponds to the game. It normally needs to be pointing at the 1st_read.bin file, or perhaps a different file if it is a WinCE game. A WinCE game can be detecting by checking if it has a 'WinCE' directory on the CD. If so, make sure you take this in to account when creating the IP file.
- Now you'll need a tool called 'mkisofs'. It is included in the selfboot toolkit. Create an ISO from the files you have extracted, and the IP.BIN in the root directory. Make sure you use an offset of 0,0 *NOT* 0,11700.
- Then you'll need to use Xeal's amazing 'Bin2Boot' tool on the ISO, which creates a selfboot CDI which puts the game data BEFORE the audio boot data. A miracle. Now the game works. It's been tested on a real non-CDR boot DC (one of the first in the UK) and it works fine.
6.2. Enabling VGA support - BootCD and Self-boot games
Boot CD
The original Utopia Boot CD 1.1 does NOT contain the VGA initialization code necessary... there IS a patch for the Boot CD image that will help with some games available from dccopyworld. The Utopia Boot CD 1.2 supposedly has the VGA patch applied to it.
IMPORTANT!!!
The Utopia Boot CD's main screen (with the reindeer) will display fine on most TV's, but the screen is in some special resolution/refresh that many monitors cannot handle, some monitors may actually be permanently DAMAGED when attempting to display this screen. Boot the Utopia Boot CD with the monitor DISCONNECTED from the VGA box. Replace the Boot CD with your non-boot game, wait 30 seconds for the game to load or check your VMU to see if the game is loading, THEN reconnect your monitor.
Self-boot games
Not always, the person who patched the game to self-boot has to enable the option to use the VGA-box when they patch the IP.BIN file. Also, if you still have the *.CDI file you can hex-edit the file. Just follow these steps:
- Open FILENAME.CDI in your favorite hex editor. And do a search for "KATANA".
- Scroll down a little until you see the string "JUE" (see vgafirst.jpg).
- Change the number string after "JUE" to "0799A10" (see vgasecond.jpg).
- Save your new file.
- Burn, and enjoy on your VGA box.
Note: the pictures are from the CNN re-release of Soul Calibur.
6.3. Removing the Echelon intro
Some people may wish to remove the Echelon intro for one reason or another, a major one being that the intro sometimes screws up the sound/music initialization in their rip of Unreal Tournament (making it emit a nasty screeching sound until a game is started).
- Extract the 1ST_READ.BIN file from the CDI or your CD.
- Fire up your hex-editor (I like HEdit or Hex Workshop) and open 1ST_READ.BIN, go to offset 0xF0000 and copy the Hex all the way to 983040 (the end).
- Make a new file 1929928 bytes large, and paste the contents of the clipboard into it.
- Save the file, and place it into a directory (ie, C:\SELFBOOT\DOA2LE), and extract the data from the CD or the CDI file into that directory as well. Now just follow ECHELON's self-boot tutorial and re-image the CD.
6.4. Why hasn't Skies of Arcadia / D2 / etc. been ripped?
Skies of Arcadia is one of the big RPG's available for the DC, the retail version being 2 GD's. To date, no one has been able to crack and release this game (or D2) because when ripped, there is *NO* FMV/MPEG or CDDA audio to downsample to make them fit onto a CDR. All cutscenes are realtime rendered, all music has been encoded, and the GD's are pretty much full to the brim with data.
On 1 April 2001, Echelon (and many other groups) participated in April Fool's Day and published a fake SoA NFO file stating they recoded the bootloader and the game now took up 4 CDR's. The news spread like wildfire among the boards and IRC channels, and I'm sure Echelon and many others got a good laugh out of it.
7. Glossary / Terminology
7.1. GD-ROM
GD-ROMs use Yamaha technology and can hold 1.2GB of data on a normal CD. CD-ROMs hold their data in binary format, in one continuous 'groove' on the CD, much like a record player. The big difference between a GD-ROM and CD-ROM is that the GD-ROM's 'grooves' are packed closer together than the groove on a normal CD-ROM, and the GD-ROM uses special CD session layouts. (unverified)
7.2. CDDA and Downsampling
CDDA means that the game has the original CD Digital Audio tracks from the original game. When a 1.2GB game won't fit on a normal 700MB cd, sometimes groups will downsample the audio or video. Downsampling is the practice of reencoding FMV/video files or digital audio at lesser quality to save space. Sometimes the groups must leave the digital audio off completely, resulting in empty tracks and missing game music.
7.3. NTSC/PAL Video formats and other misc.
USA/Jap - NTSC 60hz
Europe - PAL 50hz
VGA - Game supports the VGA cable. The VGA cable allows you to hook your Dreamcast to a VGA monitor.
Multi/Multilang - Game has multiple in-game language options.