Burning .cdi Files (2 discs, i.e. Disc Swap) - OS X & OS 9

Burning .cdi Files (2 discs, i.e. Disc Swap) - OS X & OS 9
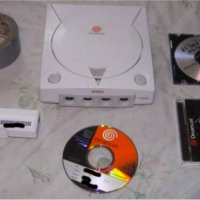
Creating Discs for Sega Dreamcast
****************
This tutorial only covers the use of Toast between version 5.1.2 & 6.0. If you are using Toast 6.0 or above, the steps will not apply directly but the method will. This method will not work for Commercial Dreamcast Games. When the .cdi's are ripped, they produce different files then mentioned. This tutorial is not for use with burning DC warez!
****************
Programs Needed
Toast Titanium 5.1.2
CDI RIP 0.6.2
Stuffit Expander
Emulator cd's will require a second GAME disc with this method.
_________
Writable CD Media used. CD-R's Only.
650mb / 70min
700mb / 80min
185mb / 21min Mini-CD's
_________
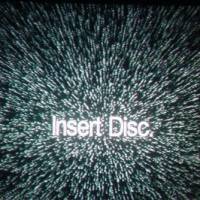
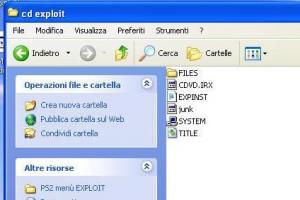
1.) Download the emulator in Disc Juggler Format(.cdi file). Unzip the file with Stuffit Expander. Now you will have a .cdi file.
2.) Launch CDIRip,and select "Cut All Tracks" then click "Rip". Select the cdi file.
Another prompt will ask you to select a folder for output, choose any folder.
If CDIRip is successful it will say "Ripping Completed succesfully".
3.) Follow the appropriate section of this tutorial depending what files were created.
It will always create a "CDIRip CDI Analysis" file.
Either:
2 Data sessions or
1 Data session & 1 Audio session
________________________________________________
2 Data tracks (NesterDc,DreamSnes,DoomDc,Jpeg SlideShow)
________________________________________________
A.) Launch Toast and select Edit > Preferences.
Make sure "Prefer disc-at-once" is unchecked and hit ok.
B.) Select MultiTrac CD-ROM XA ( click and hold down the Other button ).
C.) Select the first Data track file to put on the disc and then click Burn.
D.) Burn as Write Session. Burn at low speeds if you're having trouble.
E.) Go to the "Edit" menu and select "Clear".
F.) Select MultiTrac CD-ROM XA ( click and hold down the Other button ).
G.) Select the second Data track file put it on the disc then click Burn.
H.) Burn as Write Disc. Burning speed now should be the same it was for the first session.
It should work, scroll down for creating a Rom Disc.
________________________________________________
1 Data track and 1 Audio track ( DCDivx, LunixDC,DC Hakker,DC Loader )
________________________________________________
A.) Launch Toast and select Edit > Preferences.
Make sure "Prefer disc-at-once" is unchecked and click ok.
B .) Select Disc Image ( click and hold down the Other button ).
C .) Select the "fixed.iso" file to add on to the disc then click Burn
D .) Burn as Write Session. Burn at low speeds if you're having trouble.
E .) Select MultiTrac CD-ROM XA ( click and hold down the Other button ).
F .) Select the "header.iso" file and add it to the disc.
G .) Burn as Write Disc. Burning speed now should be the same speed it was for the first session.
Now it should work. Follow the next tutorial section to burn a Rom Disc.
________________________________________________
Rom Disc (or secondary disc)
________________________________________________
1.) Unzip the games ( roms ) with Stuffit Expander.
Different emulators want the games in a specific folder, read the text files that come with each emulator.
Usually "roms", or "games", or just the root folder ( not in any folder on the disc ).
2.) Launch Toast and select "ISO 9660" ( click and hold down the Other button ).
3.) Click on Select and then setup the file layout ( see above ) with roms in appropriate folder.
Click on the Settings tab and use this setup.
************
Format:CD-Rom XA
Naming: ISO 9660 Level 1
Append version numbers (;1) : checked
Use Apple Extensions: unchecked
************
4.) When you're done putting Roms on the disc, click Burn. Burn at low speeds if you're having trouble.
5.) Burn as Write Session if you want to add more games later. Burn as Write Disc if you wish to finalize the CD.