Use a PC-CDROM LASER on your Dreamcast (SAMSUNG GD DRIVES only) Part 2
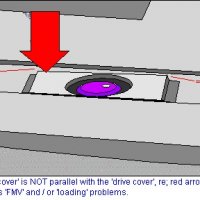
... and take off the faulty/dead laser, lifting the swirly-patter steel bar like in the next pic


Once you lift it, slightly pull it so you release the laser.
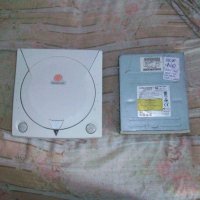
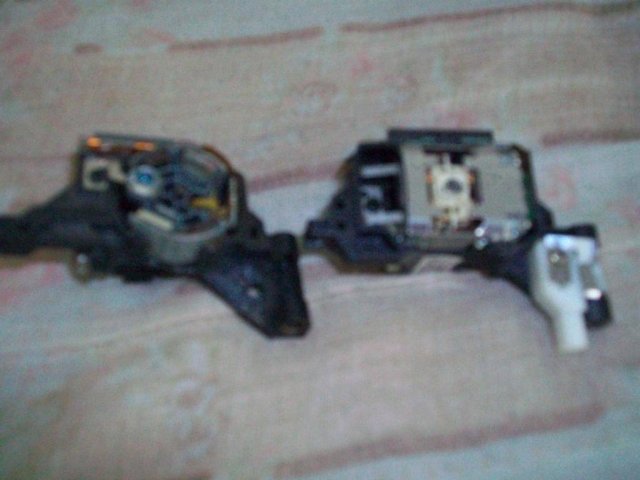
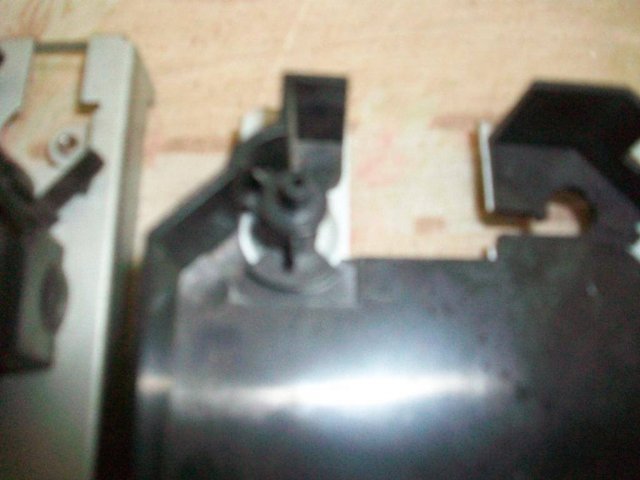
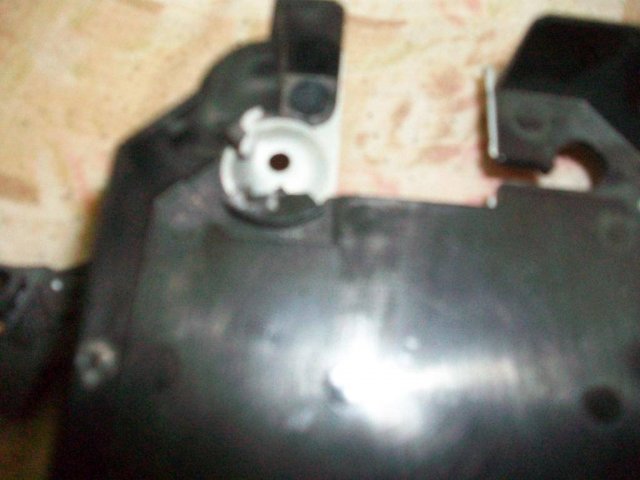
Next i'll show you WHY it's necessary to have a SAMSUNG drive instead of a yamaha. Look at both of them and try to spot the differences between these 2 (the one in the right is a yamaha, the one in the left is the SAMSUNG)
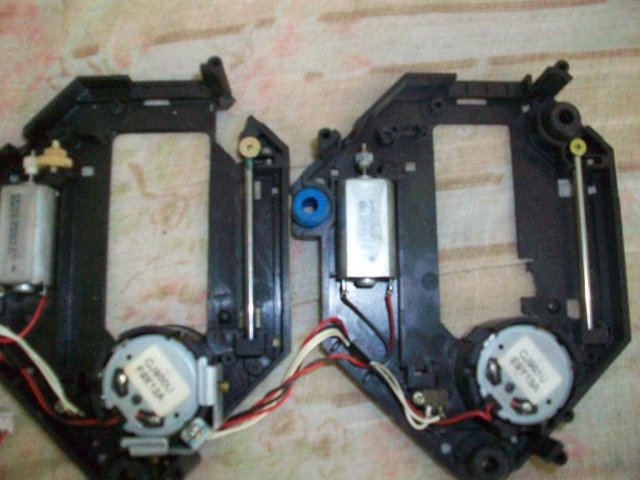

Noticed? well, in case you didn't, look at the hole in the center of the drive pickup. The SAMSUNG one is wider than the yamaha, because the format of the lens are different. While the samsung format is rectangular (wider) the yamaha format is round. If you try to fit a rectangular format lens into the yamaha píckup, it will not fit and you will not be able to finish this guide.
The next pic shows the difference between the formats of the lens, comparing the one i've used from the pc-cdrom drive and the yamaha gdrom drive.

Let's move on... the next step is to make the pc-cdrom lens to fit accordingly and to have smooth movement along the drive pickup, being an essential step, because normally the pc-cd lens are bigger than the pickup and it can't move to the end of it, causing reading problems... and here is when the saw makes an appearance XD
First things first, take a look at the gd-lens you took off your dreamcast. It has a REALLY tiny piece of plastic and a thin metallic piece. You have to take them off the gd lens and put them into the pc-cd lens. The purpose of these pieces is to follow the pattern of the swirly-pattern steel bar (so it can freely move up and down), and to touch the sensor at the very beginning of the drive pickup, so the console can recognize the laser is at the PARKING position (at the beginning of the disc). If this switch isn't pressed when the laser starts reading the discs, IT WON'T WORK. Both pieces shown above:

Once you put these 2 pieces into the PC-CD lens, start assembling the gd pickup again, using the PC-CD lens. Check if the lens freely moves up and down AND IF IT REACHES THE END OF THE PICKUP. If it does, you are done, check if it reads MUSIC CDS FIRST. If it does, check with a game, preferred with a game in a CD-R first, if so, check with a gd-rom. If all works, you've successfuly finished this guide. GO PLAY WITH YOUR FULLY REVIVED DREAMCAST! If not... keep on reading...
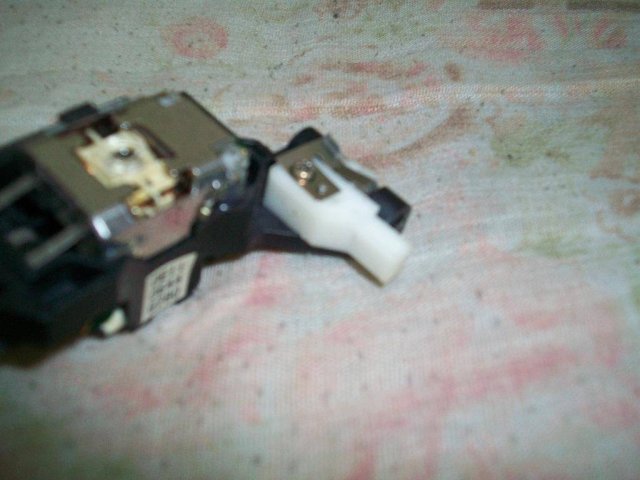
These lens are a pain in the ass to make them fit correctly into the gd drive pickup. You will have to make some heavy modification to it, here are some examples you can follow:


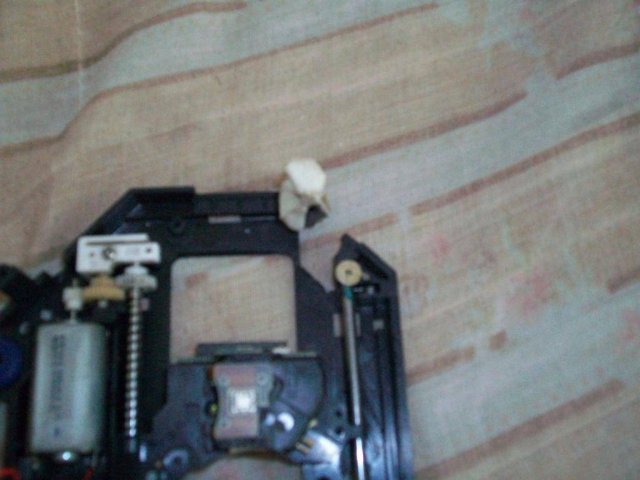

I've had to put some plastic with tape (if you are sure of what you are doing, just use glue instead of tape), so it was stabilized, due to I had to remove one of the 3 legs that supported the pickup so it can move freely.
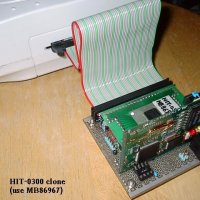
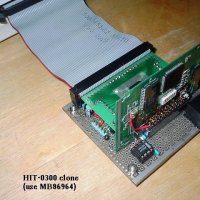
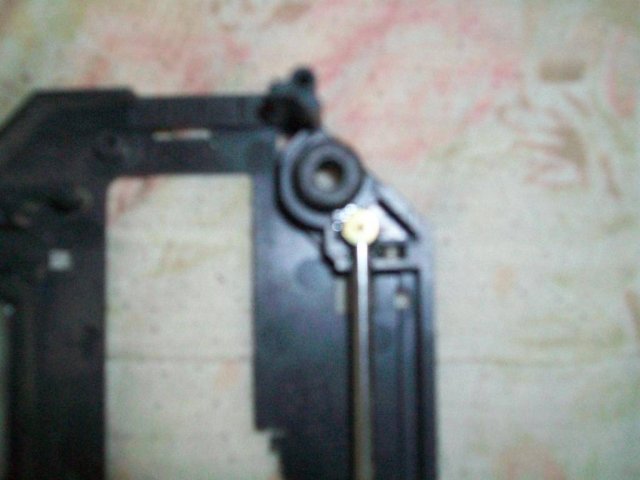
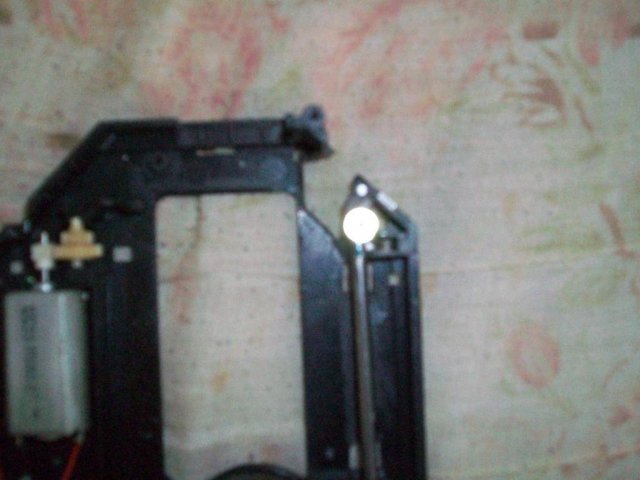
Last pic AND AN ADVICE: DC lens are NOT conventional. This ones have 16 pin connectors for the flex/ribbon cable. The real "problem" of this is that the PC lens have 17 pins. Even if there's a difference between the number of pins, IT WORKS LIKE A CHARM. Here's how to: Your flex/ribbon cable has 16 pins, and you pc lens have 17 a very simple math solution says it doesn't fit perfectly lol. So you have to connect the flex/ribbon cable in a way the last non-connected pin is the one at the left of the picture shown above (if i wasn't clear enough, you have to connect the FLEX/ribbon cable aligned FROM THE RIGHT, if you are looking the pickup in the same way shown in the pic above)
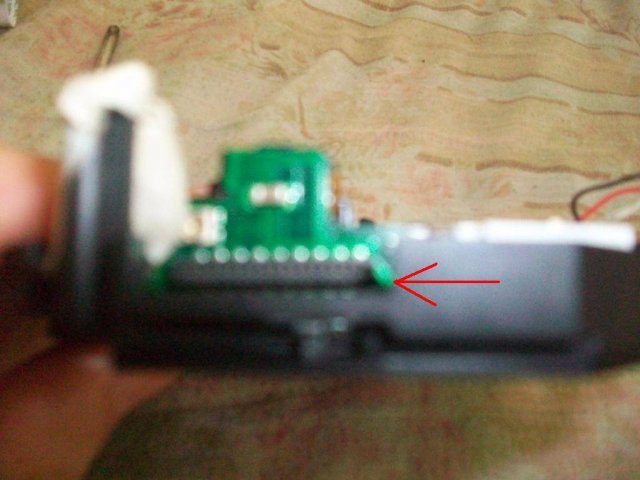

The arrow indicates that you have to connect the pins starting from the right, so the last pin in the left remains disconnected.
K, now the only thing left ot do is to put all back together and test if it works. If it doesn't work at first, keep on trying 5 more times. If it still doesn't work, you would probably like to check the connections again. If all seems ok, you should try calibrating the lens. There's a shitload of vids at teh youtube showing how to do that.
THE VIDS (showing it working)
http://www.youtube.com/watch?v=kvSrCW5fui0
THE GD-ROMS WORKS (i've used utopia since the GD is american and the console is japanese, not for other reasons)