Dreamcast lowcost Serial link
Serial link: poor man's answer to broadband adapter shortage (and pricing). It's a cheap way to transfer data between PC and Dreamcast (including dumping your own BIOS and FLASH) and pretty much the only option if you're considering homebrew software. Sure, demos and emulators can be burned onto CDs but for testing your own code you'll need a more robust delivery method :)

Some time ago I mentioned that most serial link projects out there are overly complicated. Perhaps it's because many were conceived years ago when every PC had at least one RS232 port and USB chips were expensive. I'm about to show you it can be made really simple.
I'm going to skip all the technical details and going to assume you already know:
- what is RS232 and it's limitations
- why we should stick to low-voltage signaling
- what is USB and why use it
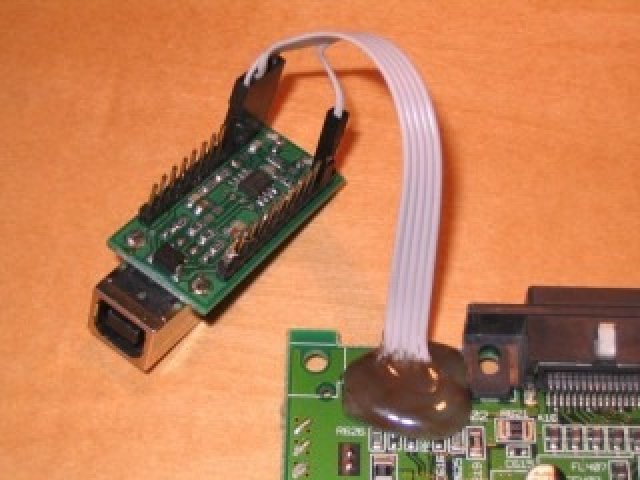
First you'll need FT232 chip from FTDI. It's exactly what we want, a simple yet fast USB to serial converter with low-voltate I/O. And by "chip" I actually mean a ready-made interface like this one:
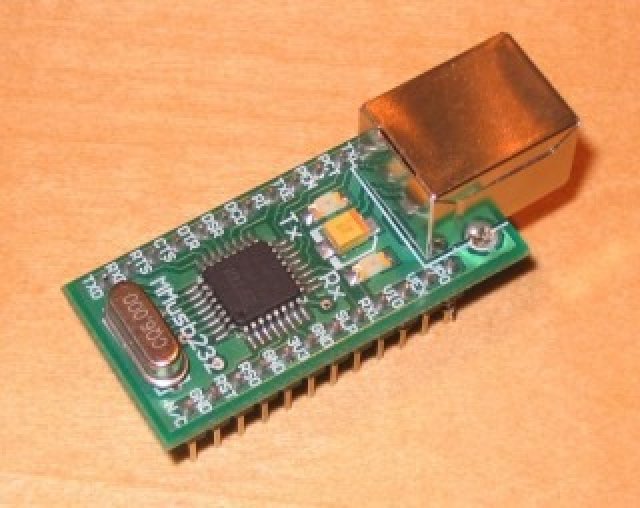

It can be powered from USB line and has internal 3.3V low drop regulator - so all it takes to make it work is two short wires: one to route power supply, one to connect LDO output with voltage reference pin for I/O.
Now for the Dreamcast part. I found it impossible to purchase a connector that would fit the serial port so it had to go. You won't miss it, trust me.
First cut the connector assembly in two, with a small saw blade or a file. Take your time, you don't want to damage anything on the board (hence the black tape by the way). Pay attention to where exactly are you placing the cutting point, you will want both sides of the video connector intact so that the screws will hold it well in place.
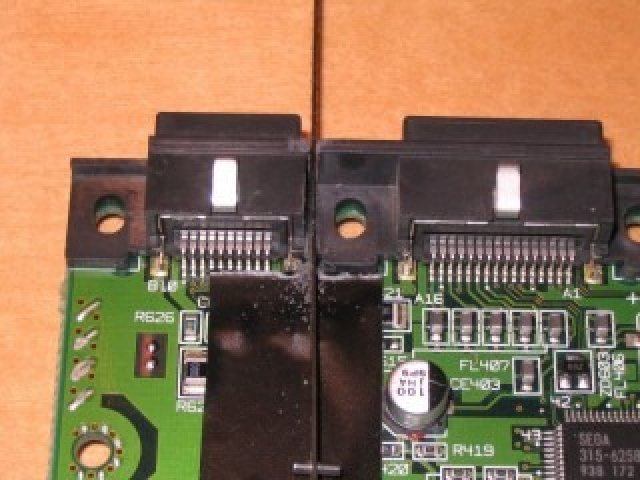

Cut the connector legs with precise cutters. And I do mean precise, too big will rip them off the board, possibly damaging the traces as well. The alternative is to insert a small, flat head screwdriver (or something like that) under the pin and pry it up as you heat the soldering point with iron tip. Again, do not apply any force before melting the solder. The pins on right were cut, ones on the left were lifted.
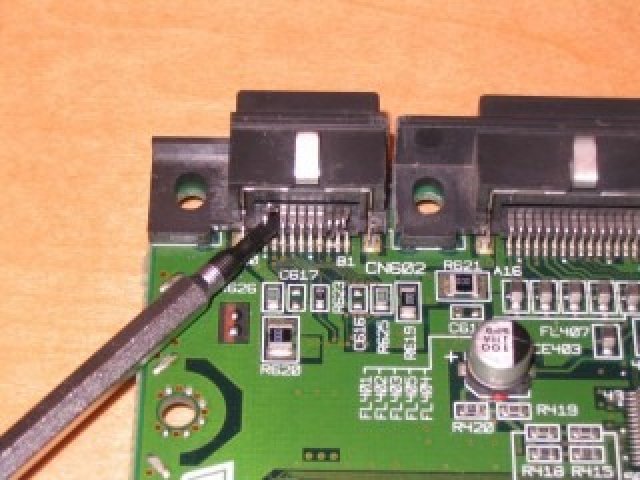

Now desolder the shield and remove unwanted connector part completly. Don't throw it away yet, you'll need to cut off the other side mounting wing too, to provide a proper spacing for metal heat exchanger. Well you can always use a couple of small washers for that if need be.


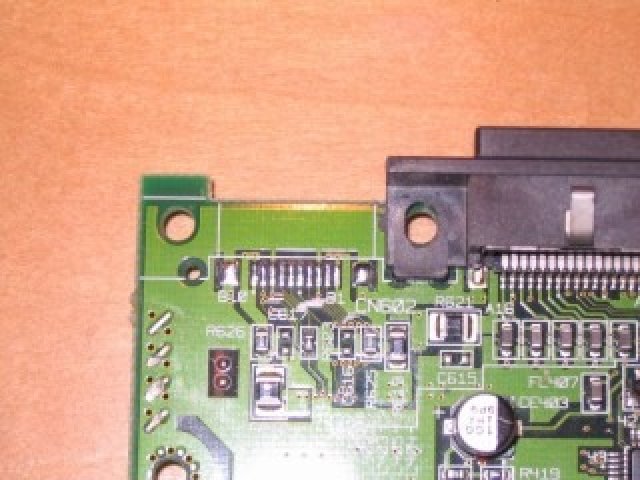
And here's a picture of the pads cleaned, with any leftover pin remains removed.

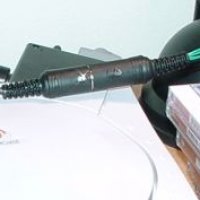
Now you just need to solder 5 wires (RxD, TxD, RTS, CTS and ground) to the pads. I used one of the shield pads for ground, that makes it easier to fit the other four. That can be somewhat challenging with thicker wire but it pays off to have it durable and safe to twist around. Glue gun does the rest, just don't overdo it or you'll have problems fitting the covering plate/heat exchanger.
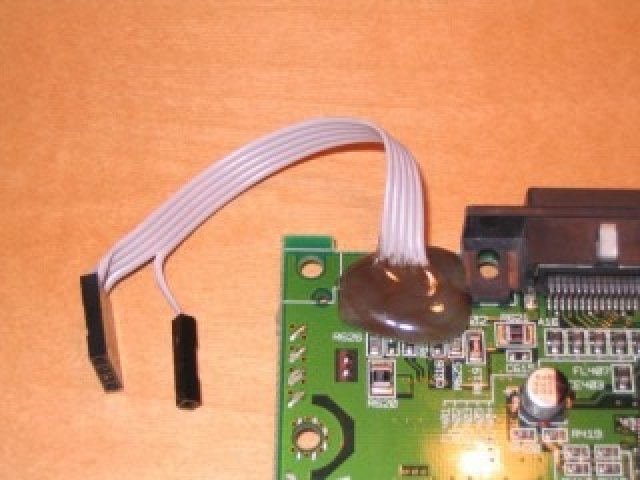

Ready to rock :) You can even see the wire I used to route USB power and I/O reference. All you need to do now is put it all back together and get friendly with dcload-serial tool.

So, does it work? Hell yes, on 3 Dreamcasts already. Same technique in every case. Works like a charm up to 1.5Mbps too. Just keep the wires to FT chip as short as possible (already long board traces and protective RC elements not helping any). If you have problems with higher speeds you can try using 5V instead of 3.3V for I/O. I belive this to be pretty safe (run it for hours on my Dreamcasts) but make no guarantees.
Some people say even 3Mbps can be achieved when protection RCs are removed but that will open a direct line to SH4 pins and you risk permanent damage to it. Obviously, no 5V in that case.
There's no galvanic separation here, wouldn't make much sense with common ground, so even if DC power supply is floating (I think) make sure you connect everything to the same AC phase. Or suffer the consequences.
Oh, and yes, the wires just stick out of the back of Dreamcast. Hey, it's cheap and works :)
UPDATE: Few more details, should be more useful now :)
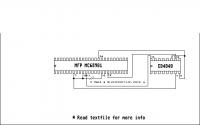
First, here's a simplified pinout (only the required signals shown):
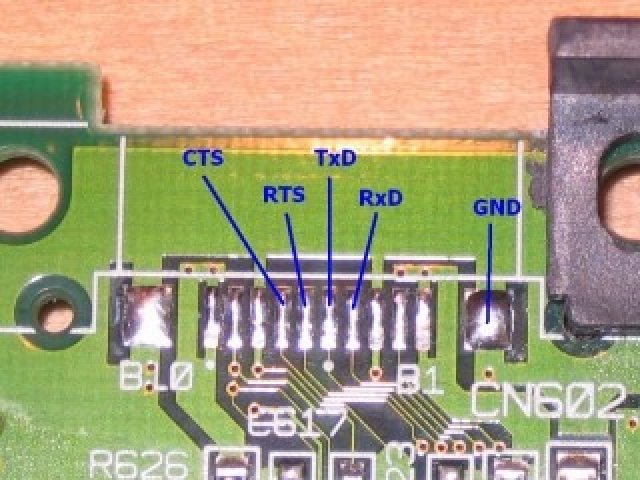

And just in case someone needs this extra bit of info, the whole serial port carries these signals on B10 down to B1 (looking at the picture above that's left to right): 3.3V, /RESET, GND, CTS, RTS, TxD, RxD, GND, SCK, 5V. And as you can see the big pads on both sides (connector shield) are also tied to ground.
This particular serial to USB converter was bought here: http://www.propox.com/products/t_93.html
It's a pretty common design but there's a manual with schematics for download on that page if you need them.
Pins VPO, VEX and VIO are connected together in my photo. That's PORTVCC, EXTVCC and IOVCC - and that means 5V on the I/O pins. This is actually by mistake, I'm short on these modules and when I swap it around I often forget to re-wire it properly for Dreamcast. As I said, it will work like this but that's unsafe.
You should connect IOVCC to 3V3OUT instead. With this module you'd just put a jumper on pins 24 and 23 and connect 22 with 18 using a short, insulated wire.
And don't forget it's a null-modem so TxD from the board goes to RxD pin on the FT chip and vice versa. Same for RTS/CTS control signals.
Hope that helps!