Dreamcast Dev Bios (Part 3)


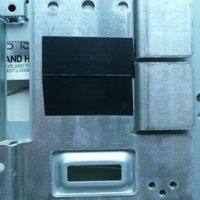
It's ready to re-assemble now. I decided to insulate the metal plate directly above the new BIOS chip just in case one of the resistors move and touches it. You can re-assemble the console but leave all the screws and the top of the case of, you can then use the switch and hold the lid control switch also.
Switch your machine on and if you get a blank screen then you've probably got the switch in the position which selects the new (currently blank) BIOS. Flick the switch and restart the console. It should start up now as expected, set the date and time (that's because you had to remove the controller ports with the battery on.
Download and burn the link83.nrg Nero Burning ROM disc image. I burn it at 4 speed Disk At Once mode. Pop the disc on, hold or tape the lid control switch and either restart the console or select Play from the dashboard. This disc is a customised version of DC-Swat DreamShell disc, I've altered the configuration files and deleted the alternative BIOS files to try and make the download as small as possible.
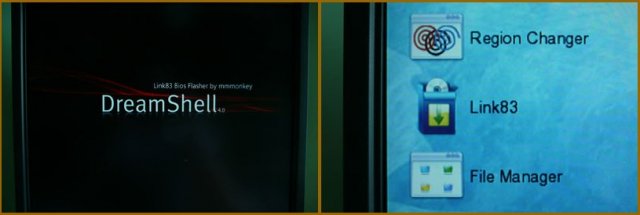

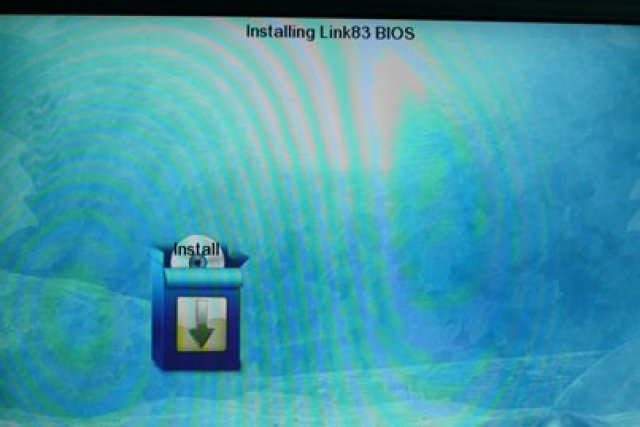

The screenshots above show you what to select, but it's pretty much self explanatory :-) Before selecting Install from the last screenshot, flick the switch you've installed to the other position selecting the new Flash chip. After you select Install, the screen goes black, with white writing, it should display some info about the Flash chip you've just installed, pause for around 15 or so seconds, and then start erasing the chip, then immediately start writing to it.
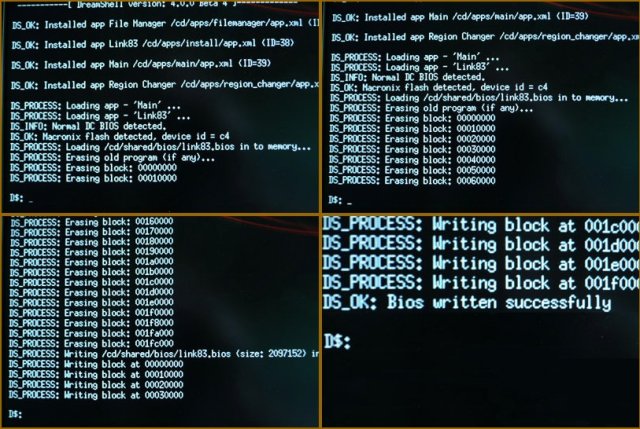

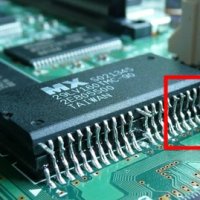
You shouldn't get any errors during the erase or writing stage. I did the first time I did this, and that was because I didn't link up legs 23 properly on the BIOS chips. The flashing software correctly identified the chip, but couldn't erase or write to it.
Once it's finished, a quick confirmation message appears and then it returns to the menu screen. You can restart your console now, the switch will still be in the position selecting the new flash chip, you should then see the 3D Animated Logo startup screen from the DreamCast Development Console.
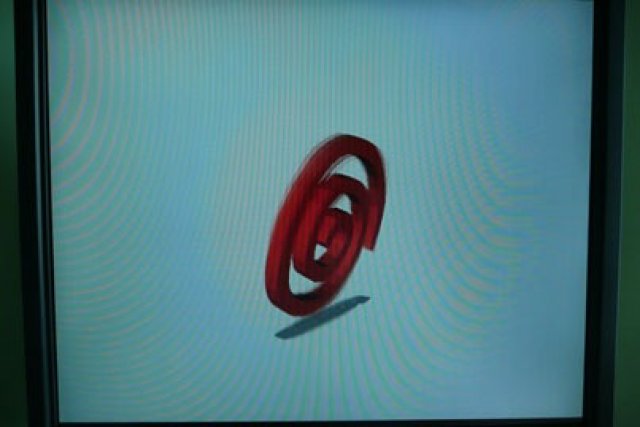

That's pretty impressive! The colour of the swirl depends on what region settings your console has. You can change it using the instructions here (you don't need to download the region changing disc though, it's included in the DreamShell disc). Remember to disconnect the link wire after you change your consoles region/swirl colour.
You can either mount the switch in the case allowing you to select the BIOS, or you can hide the switch in the console somewhere (probably best to wrap it in insulation tape and stick it somewhere to stop it rattling around), or you can remove the switch and hardwire it to always boot from the new BIOS.
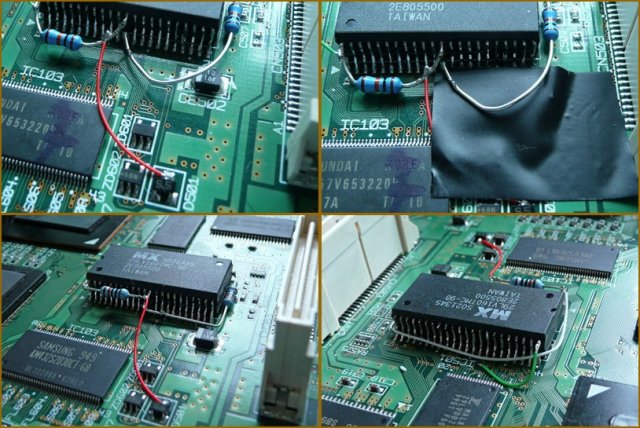

You can see I've removed the switch and soldered a wire from the same point on D501, to the resistor which is going to leg 12 of the new Flash chip. The third and fourth photos above shows the slightly tidier install I've done following my own guide.
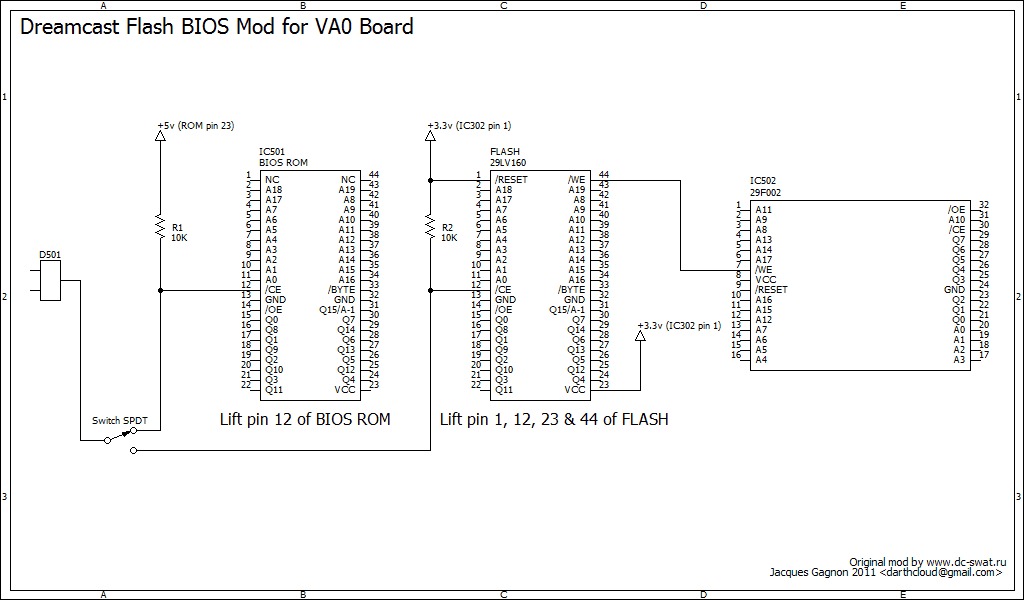
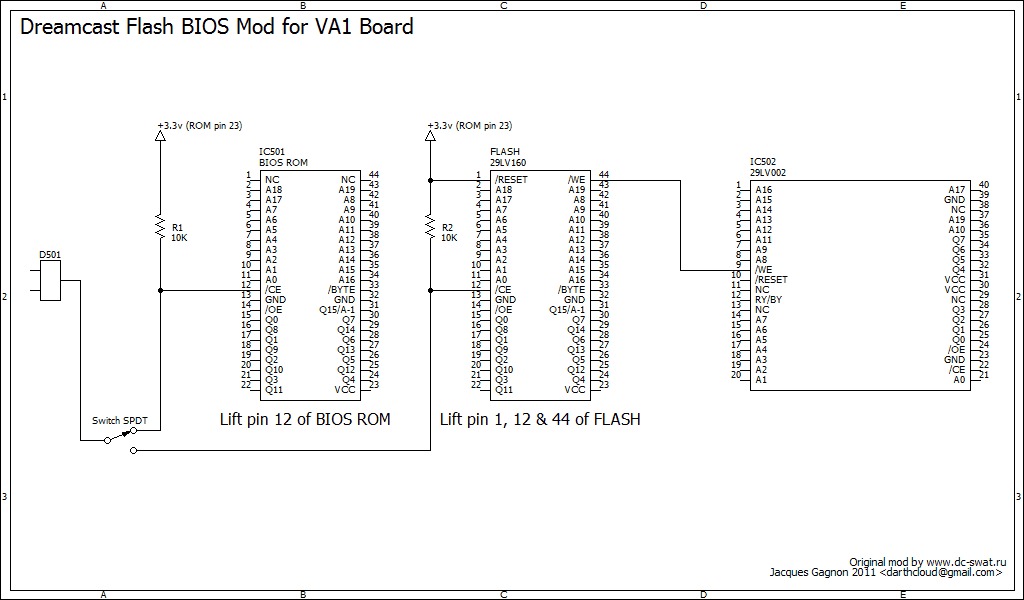
Here's a copy of the diagram from DC-Swat, I've added a small bit of extra info which helped me solder it up properly.
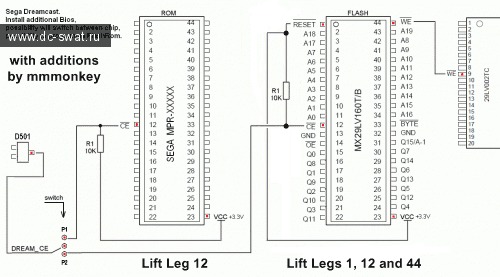

Scrap that diagram, DarthCloud has done some lovely new ones!


All of the info can be found on ASSEMblergames Forums. I've picked out some of the most relevant posts below that I used to perform this mod.
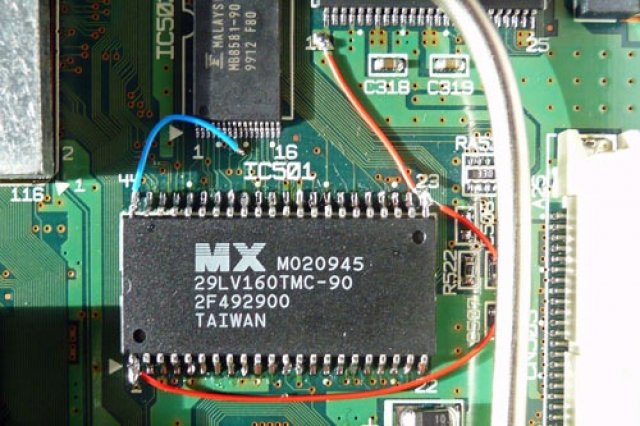
I recently bought some pre-flashed chips from Bad_Ad84 and removed the old chip from the motherboard to fit the new one (read this on how I remove the old one and solder the new one). This is the VA0 motherboard that you need to lift wire Legs 1 and 23 to leg 1 of nearby IC302. Leg 44 still needs wiring to leg 7 of IC502 (or, at least, a point that it's connected to).